Special delivery via UPS Freight.
|

Mostly intact. The boards came loose but the engine was
not damaged. |

Looking for obvious visual signs of oil leakage. No
leaking here at the rear main seal. Very good.
|

Driver's side of engine has nice header gasket seal. No
sign of oil leakage from valve covers or oil pan. |

Passenger side has a very good header gasket seal. Some
oil film on the oil pan that probably blew back from the front.
|

Here is some (very slight) oil film. |

Some slight oil film.
|

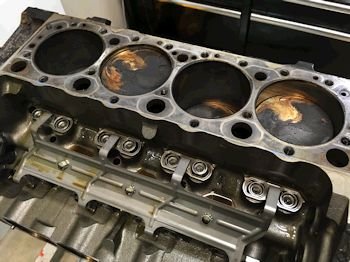
Cylinder #1 has a very large crusty build up. (Oil?). |

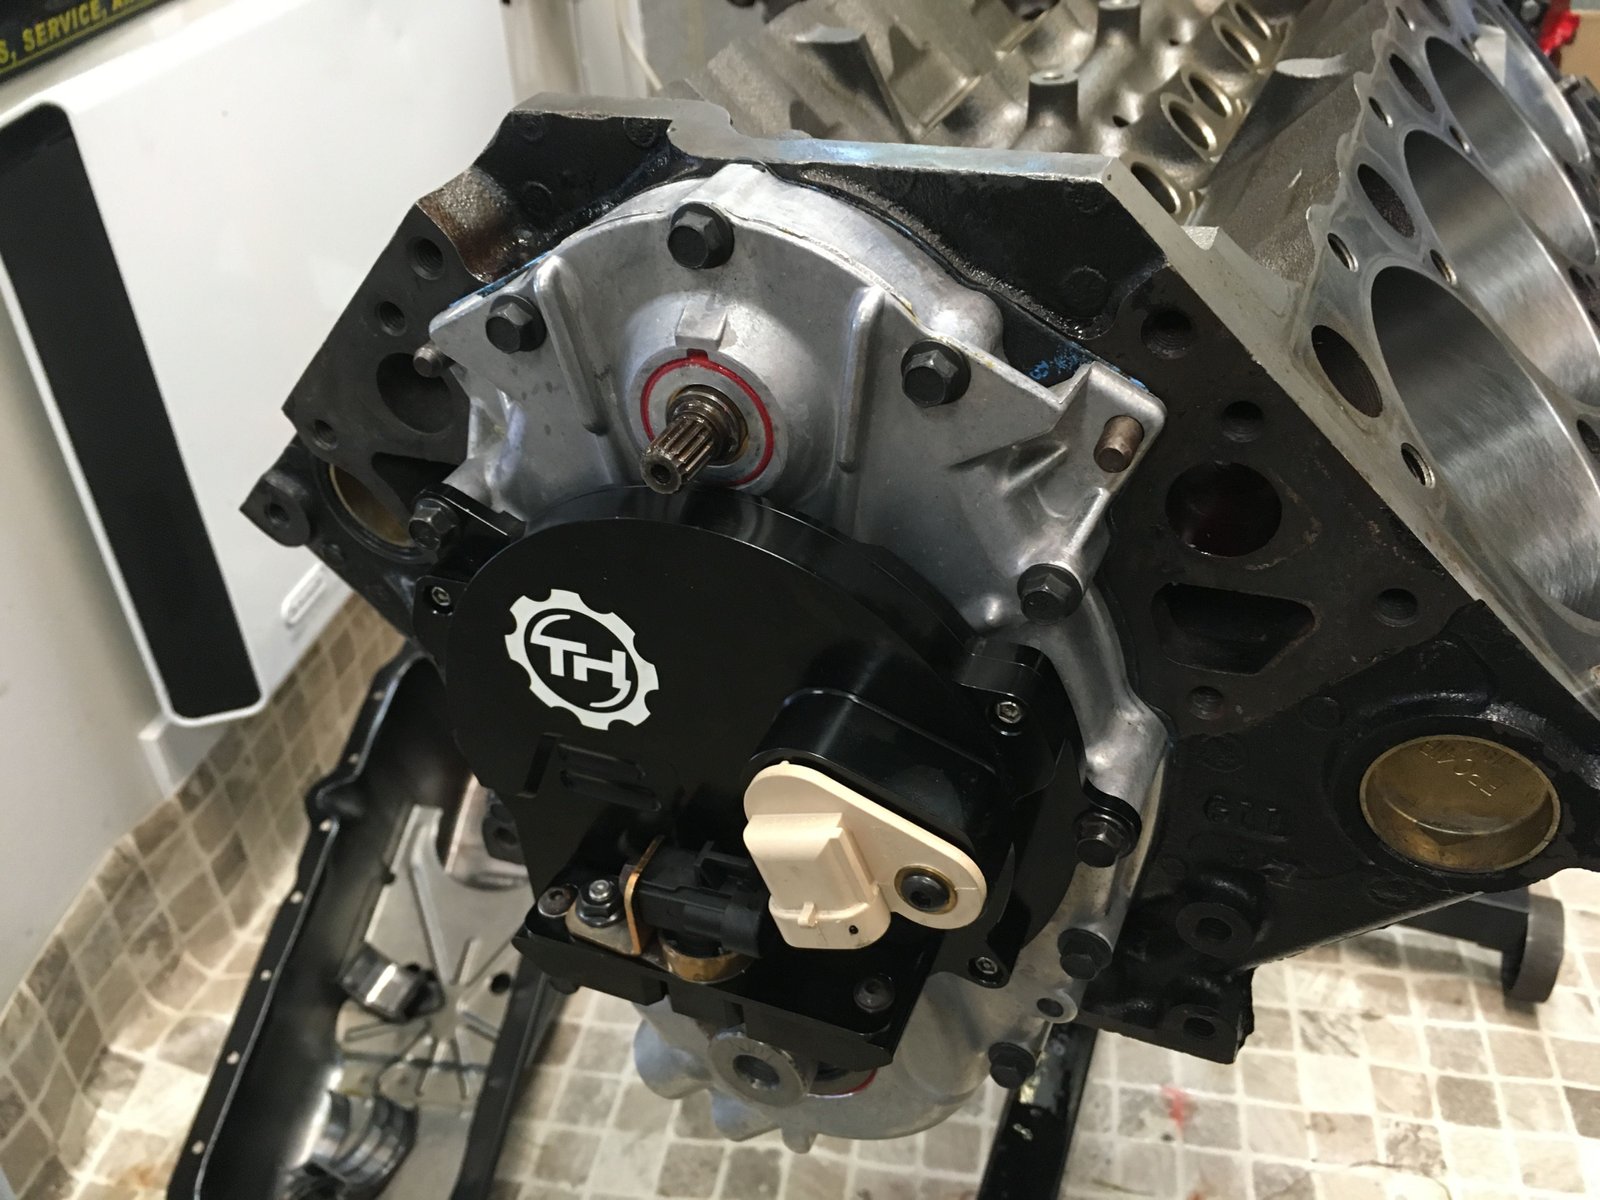
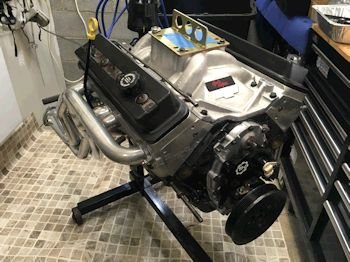
A view of the front of the engine: This 396 LT1 has the TorqHead
sensing unit to allow the use of an LS1 PCM and coil packs.
NICE!
|

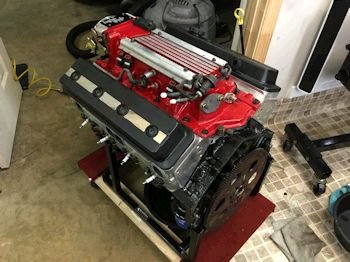
Nice LT4 intake manifold and TFS heads with LT4 composite
valve covers. |

Just now noticed...one timing cover bolt is missing and slight
oil has seeped out. Probably was blown back along the
passenger side of the engine.
|
 |

Also note that there are no oil pan rails which if present would
help with the oil pan seal. I think the oil pan sealed well in
spite of that though.
|
This is the TorqHead sensing unit that had the missing
bolt. Oil was definitely leaking from here. |
Intake manifold off. Very clean in the valley. But
lots of oil in some of the intake runners. Maybe bad valve
stem seals or maybe a bad intake manifold gasket seal.
|

The gasket used was the GM LT4. It's very hard to see or
determine if the gasket was leaking and allowing oil to be sucked
into the intake runners. Possibly....most likely. |

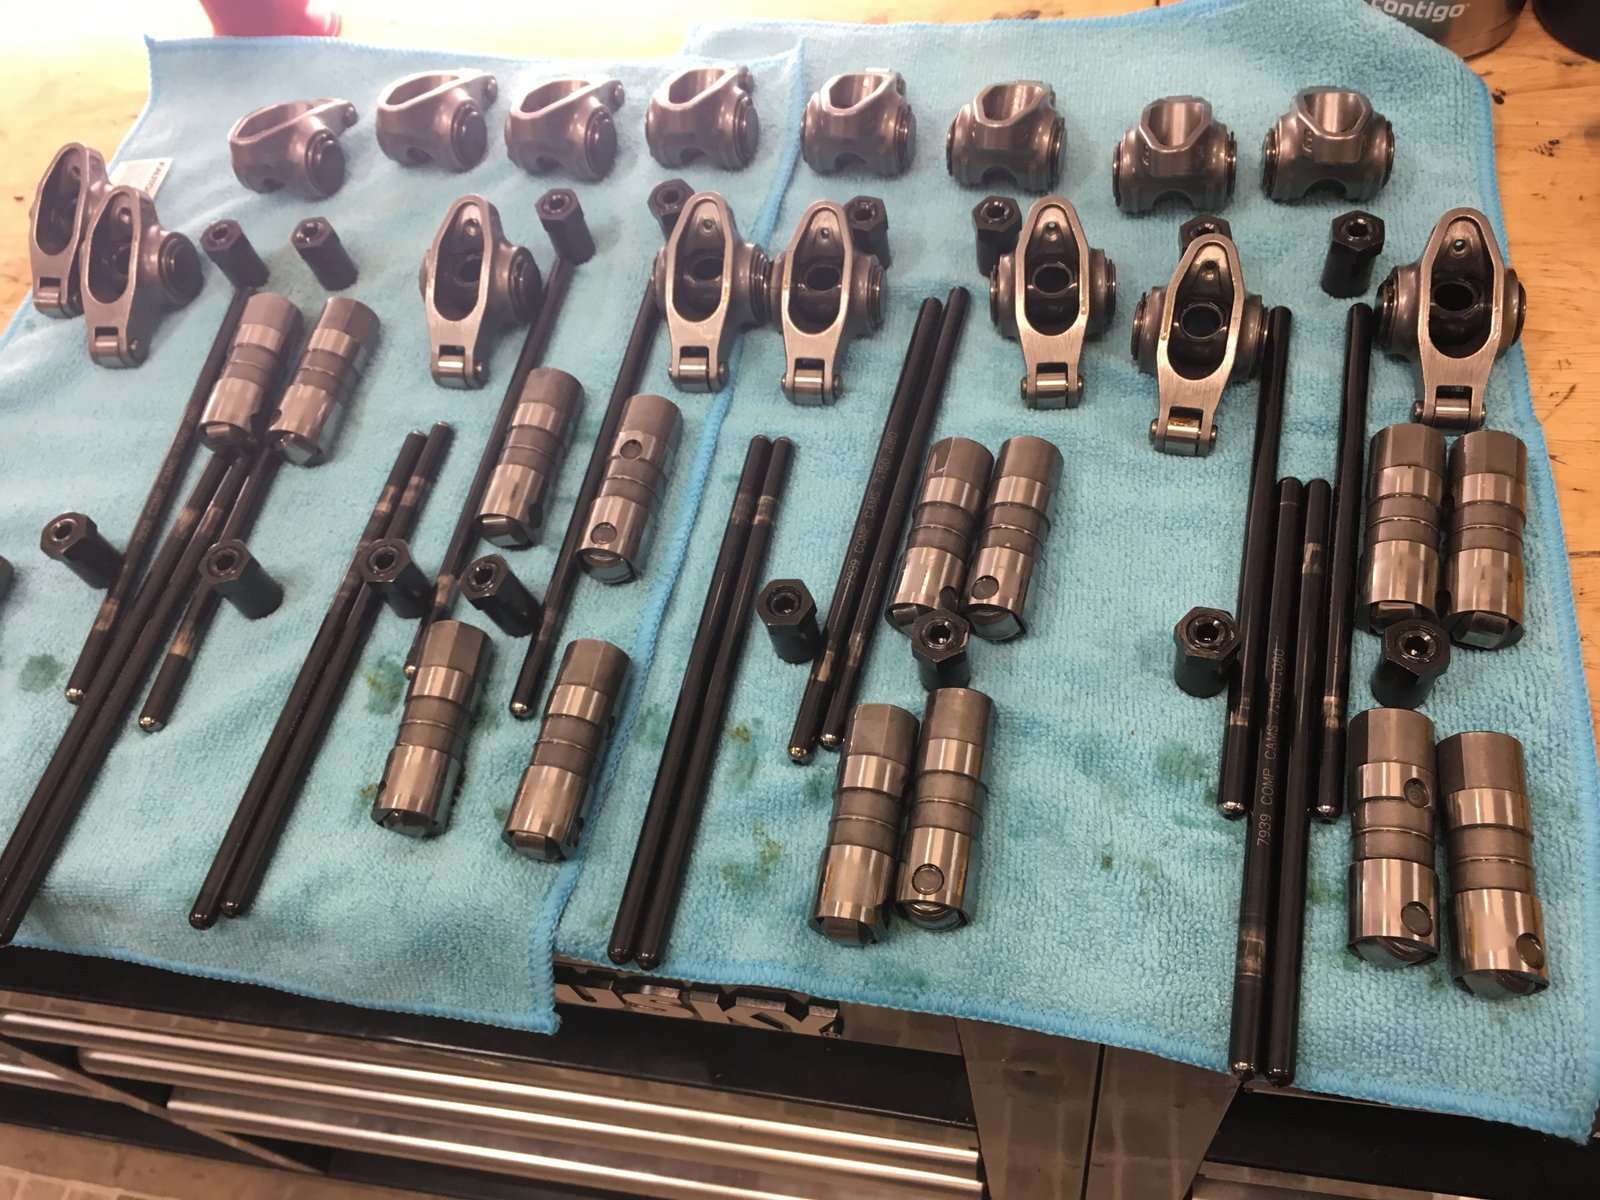
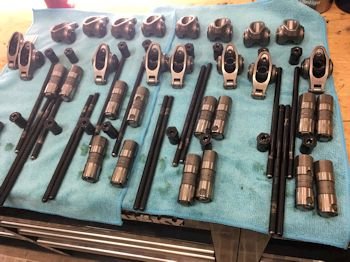
The valve train is most excellent! Good rockers and nicely
set up.
|

The rockers were riding the valve tips perfectly. The
pushrods were 7.150" Comp. The pushrod guides were
welded after adjustment. Very nice. |

Piston top has quite a bit of oil.
|

#2 |

#4
|

#6 |

#8
|

Passenger side head. |

|
 |

Driver's side head.
|

Notice that the oil pan has no rail. It does have an
external film of black RTV over the bolts. It does not look
like there were any leaks from the oil pan/gasket. |

Oil pan removed. This pan is perfectly clean. Golen
did a good job of making sure the engine was clean.
|

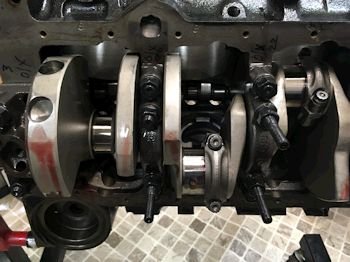
Here is the rotating assembly directly after removing the oil
pan. Eagle forged crankshaft and SCAT I-beam rods with SRP
pistons. |

The rods and crank journals are very clean.
|

Rod bearings are pretty good. Not perfect but still
quite good. The pistons all were in very good shape except
having all of the oily dirt on the piston tops. |
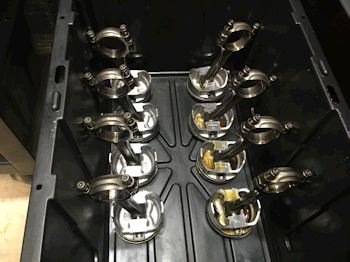
All pistons and rods are in excellent shape.
|

Crank looks great. |
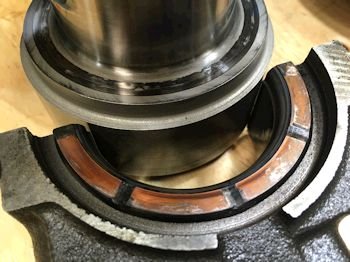
Very unusual wear marks on the crankshaft thrust and bearing
thrust surface.
|

I put the crankshaft back into the block to measure crankshaft
end-play and it's normal at .007"
Will have to polish the crankshaft thrust journal. |

All of the main bearings are in perfect shape (except for the
thrust).
|
Block goes to the
machine shop for a pressure test and torque plate hone. I'll
send the heads too and have the valve stems and seals
checked. Crank will have the thrust journal checked and
polished. |

Block has been pressure tested (SAT) and torque plate
honed. Now ready for assembly mock-up. Final cleaning
will be after mock-up.
|

Crankshaft polished. |

|

Rear main bearing 1st checked at .0020" clearance with
standard size Clevite bearings. Then went with a mix of
standard and .001" under, (X). Now it's where I like
it. .003". |

Next main needed a mix of standard and X also. It was
.0015" with Standard/Standard. Now it is .0020 with X and
Standard mix.
|

#3, and #2 need a mix of X and standard but I ran out of
oversized bearings. I have a box on order. #1 is good
as it is now with .018" clearance using standard/standard
bearing 1/2 shells. |

The thrust bearing is .004" by feeler guage.
|

The crank thrust (end-play) is .007" |

|
The bucket of
pistons/rods are shown after at least 1 hour of cleaning off the
cooked on carbon. I used my parts washer and elbow
grease. |
Now with my new supply of 1X bearings....#1,2,3,4 are at .0020"
clearance and #5 is at .0030 clearance. (That's with a standard and
X mix).
|

Tapped the oil galley ends for threaded plugs. Then
performed a final cleaning with hot water, soap and a pressure
washer. |

All cleaned up.
|

Threaded plugs installed. 2 plugs have oil weep holes for
timing set cooling. |

New cam bearings installed.
|

Oil galley plug installed and verified prior to installing crank
and main caps. |

|

Cam installed and mains ready for the crankshaft. |

Thrust now at .006"
|

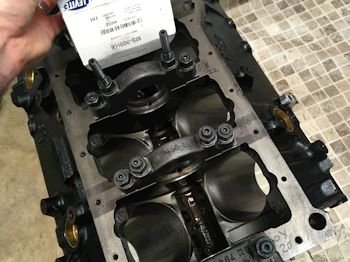
Timing set installed. Next on the agenda is measuring rod
bearing clearance and installing pistons/rods. |

|
To the left is the
rod bearing clearance check. All rods were torqued to 63
ft-lb as per SCAT web site 1.6" bolt. All 8 rod
bearings were from .0020 to .0021"
The same Clevite H bearings were re-used because they were in
fairly good shape. These are the regular size and not the
"N" Narrow. All rod bearings were standard size.

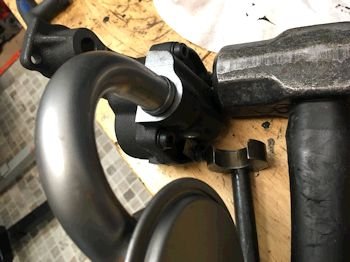
Above: HV oil pump that came in the engine. I'm
not a fan of that pump because it can cavitate. The standard
volume M155 is my favorite now and actually Melling makes a shark
tooth version that is the 10554ST and I have that on order. |

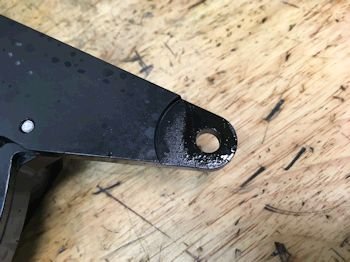
I added the windage tray studs. The motor did not have a
windage tray installed and it certainly can benefit from a windage
tray.
|
Rod had a measured side clearance of .022" (not shown). |

|
 |

Unknown camshaft specs. But I measured intake centerline
and it is 111 to 112 deg.
|

Ready for oil pump and windage tray. |
"press-in" of oil pump pickup.
|
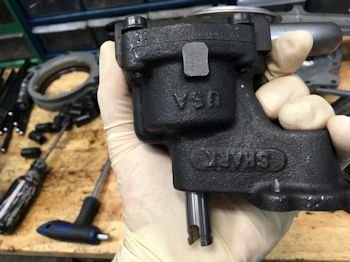
This is a new design by Melling, the Shark tooth. It has
billet gears and is the 10554ST. Standard volume/Standard
pressure. |
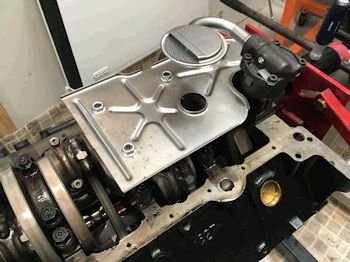
Windage tray installed. The engine did not have a windage
tray and personally I think the tray is a must. Oil will
become aerated without this.
|

I replaced the medium quality oil pump bolt with a high
quality ARP. Torqued to 77 ft-lb. |

Timing cover and TorqHead sensor unit installed.
|

Windage tray bent down and away from rotating assembly. |

Rear main seal housing centered via .004" feeler at each of
the 3 nubs.
|

Premium Mahle rear main seal. |

Pistons are all at 0.000" deck height except #1 which is a
.002" (weird). The FelPro 1074 head gasket
will give .039" piston to head clearance.
|

Refurbished TFS heads. Mild valve job and spring
height/spring pressure verified. |

|

ARP head bolts re-used after cleaning and application of
Permatex thread sealant and CMD lube #3. |

|
 |

|
To the left:
New oil pump drive gear GM #19052845

Comp 1.52 ratio rockers on the intake and 1.6 ratio on the
exhaust. |
|
|

The lifters pass more oil than normal. An operating
engine would be gushing out oil like a geyser. |

Notice here the valve cover full of oil after 1 minute of oil pump
drill spinning.
|
 |
Lifters removed.
|

A set of good used stock lifters next to the Comp liters. |

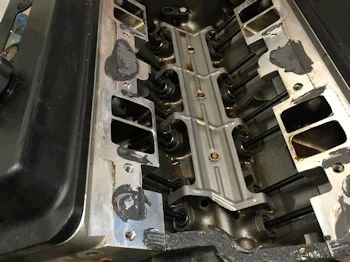
All stock lifters installed.
|

All lifters pass a small amount of oil to the rockers...much more
like I'm accustomed to. |

Here is a tiny trickle of oil as expected.
|

Now with dyno intake manifold installed. This is a GMPP dual
plane carburetor manifold. |

|
To the left is my
verification of TDC.
Hard to see?
The 2 yellow marks on the inboard side of the damper--the engine
side---are on each side of the damper TDC mark. That is
where my piston stop "stopped" the crank on either side
of TDC. Then a tape measure to find the center between the
two marks. It's right on the TDC mark of the damper,
(thankfully). If not you move the pointer. This is my
shop damper which has TDC marks. A stock damper does not
have marks. |

I use one or two header studs to help guide the header gasket and
header onto the head.
|

Here is my favorite header gasket. Earl's pressure master.
Looking up the part number 29D03B3ERL I'm surprised to find out
that it's discontinued!!!!! I'll have to find new-old-stock
somewhere. These do not leak! I guess you would get
the "cut-to-fit" style now. (29DE3BERL) |

Here are the recommended "gasketed" spark plugs for the
TFS heads. Autolite 3923, (one step colder than stock). A 3924
is the same heat range as stock.
|

Distributor in at 36 deg BTDC. |

OOOPS. Stock crank damper bolt busted. Thankfully I
could remove the other end of it that was still sticking out of the
crank nose.
|

Here is a donated used ARP crankshaft bolt to replace the broken
one. |
Ready for the dyno.
|

Rear of camshaft for records and documention. |

Almost ready for ring seating and a few full sweeps on the dyno.
|

This is Jim Morgan's dyno at Morgan International, Faulkner,
MD. |

|

Here is the post dyno work. A look at the exhaust ports
and the intake valley and the oil. Also installing customer
LT4 intake manifold. Everything looks great! |

LT1 intake gasket used for the dyno carburetor manifold.
LT4 will be used for the LT4 manifold.
|

Oil pump drive with new gear installed and with the bolt at a
careful 20 ft-lb, (no cracking of the tab). |
Next step is to put it on a pallet and box it up for shipping.
|
 |

Here is an option for venting the crankcase, (that is if you
lose the tube that goes from the valve cover to the throttle body as
I did).
|

Some tape to protect during shipping. |

A sturdy little box is built around the engine-on-a-pallet.
|

I use old serpentine belts as my hoist sling. (They are
not included) The large sturdy bolts are included though so
that you can hook up your chain or belt. |

The engine is bolted to an engine stand and that is bolted to
the pallet floor. The oil filter adapter is just in case you
want to delete the oil cooler.
|
|