Here is the fully machined block. It has Milodon splayed
caps and ARP studs.
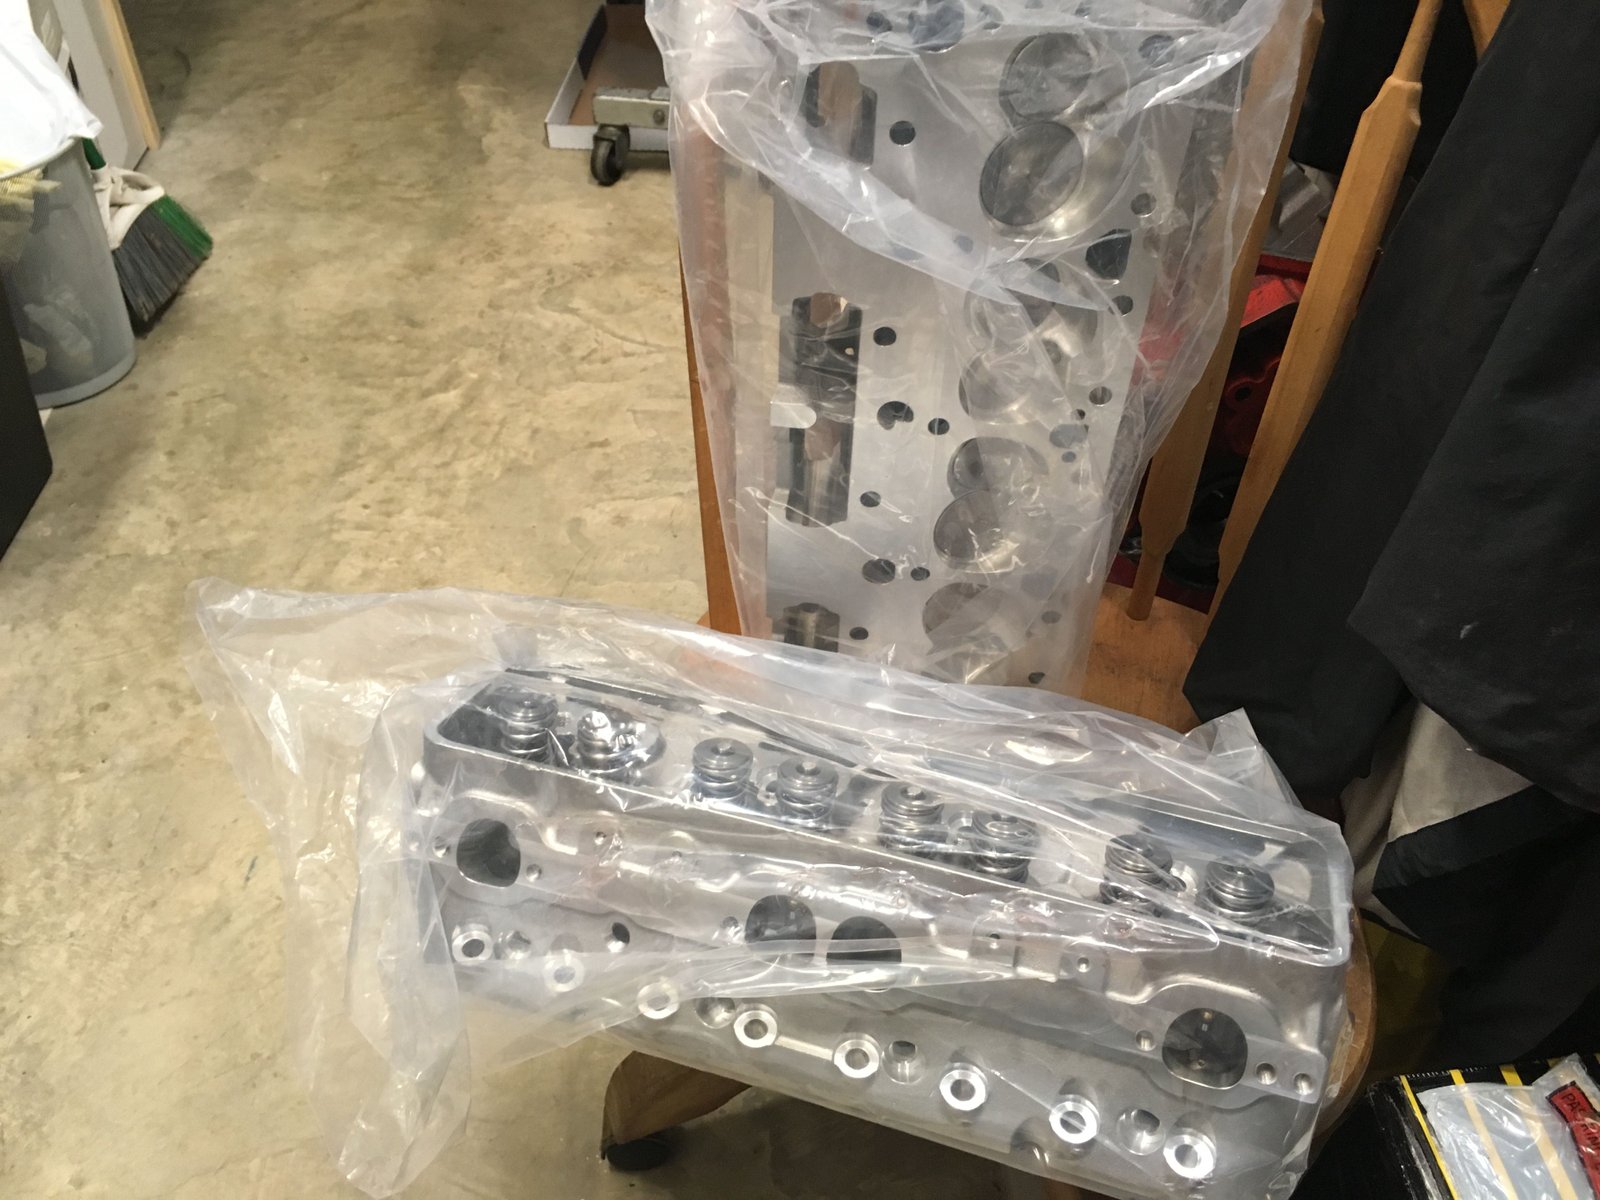
These are Advanced Induction ported TFS 21* heads.
Upgrade spring package: Manley Nextek 221435-16 springs with
titanium retainers.
Should be around 62cc combustion chamber. These will be cc
volume checked at a later date.
Still waiting on Callies Magnum custom made crankshaft.
To tide us over here are photos of the parts that have been
collecting. The TorqHead ATI BBC hub with 24x reluctor and
also the TPIS timing cover that accommodates the BBC hub.
Ellwein/Stef's oil pan. Oil return 1/8" NPT for
turbo on passenger side along with drain plug. But Stef's
accidentally put the oil level sensor bung on the passenger
side. I usually delete the level switch and put a
sight-glass in place.
Driver's side, also the 1/8" NPT for turbo oil return and
another drain plug.
Drag racing trap door. No windage or scrapers by my
special request. That just complicates oil pans and does not
help above keeping the stock windage tray.
Here we have a new and different Stef's pan. I ordered this
so that all was perfect for oil return and with the oil level
switch bung on the correct side.
The crankshaft has
been completed. Callies Magnum crankshaft and Callies Ultra
I-beam rods have arrived. Time to clearance and massage the
block.
Block is ready for grinding.
Here is where I grind on the block to allow for oil return from the
drivers side head gasket.
All cleaned up after clearancing. Oiled with WD40.
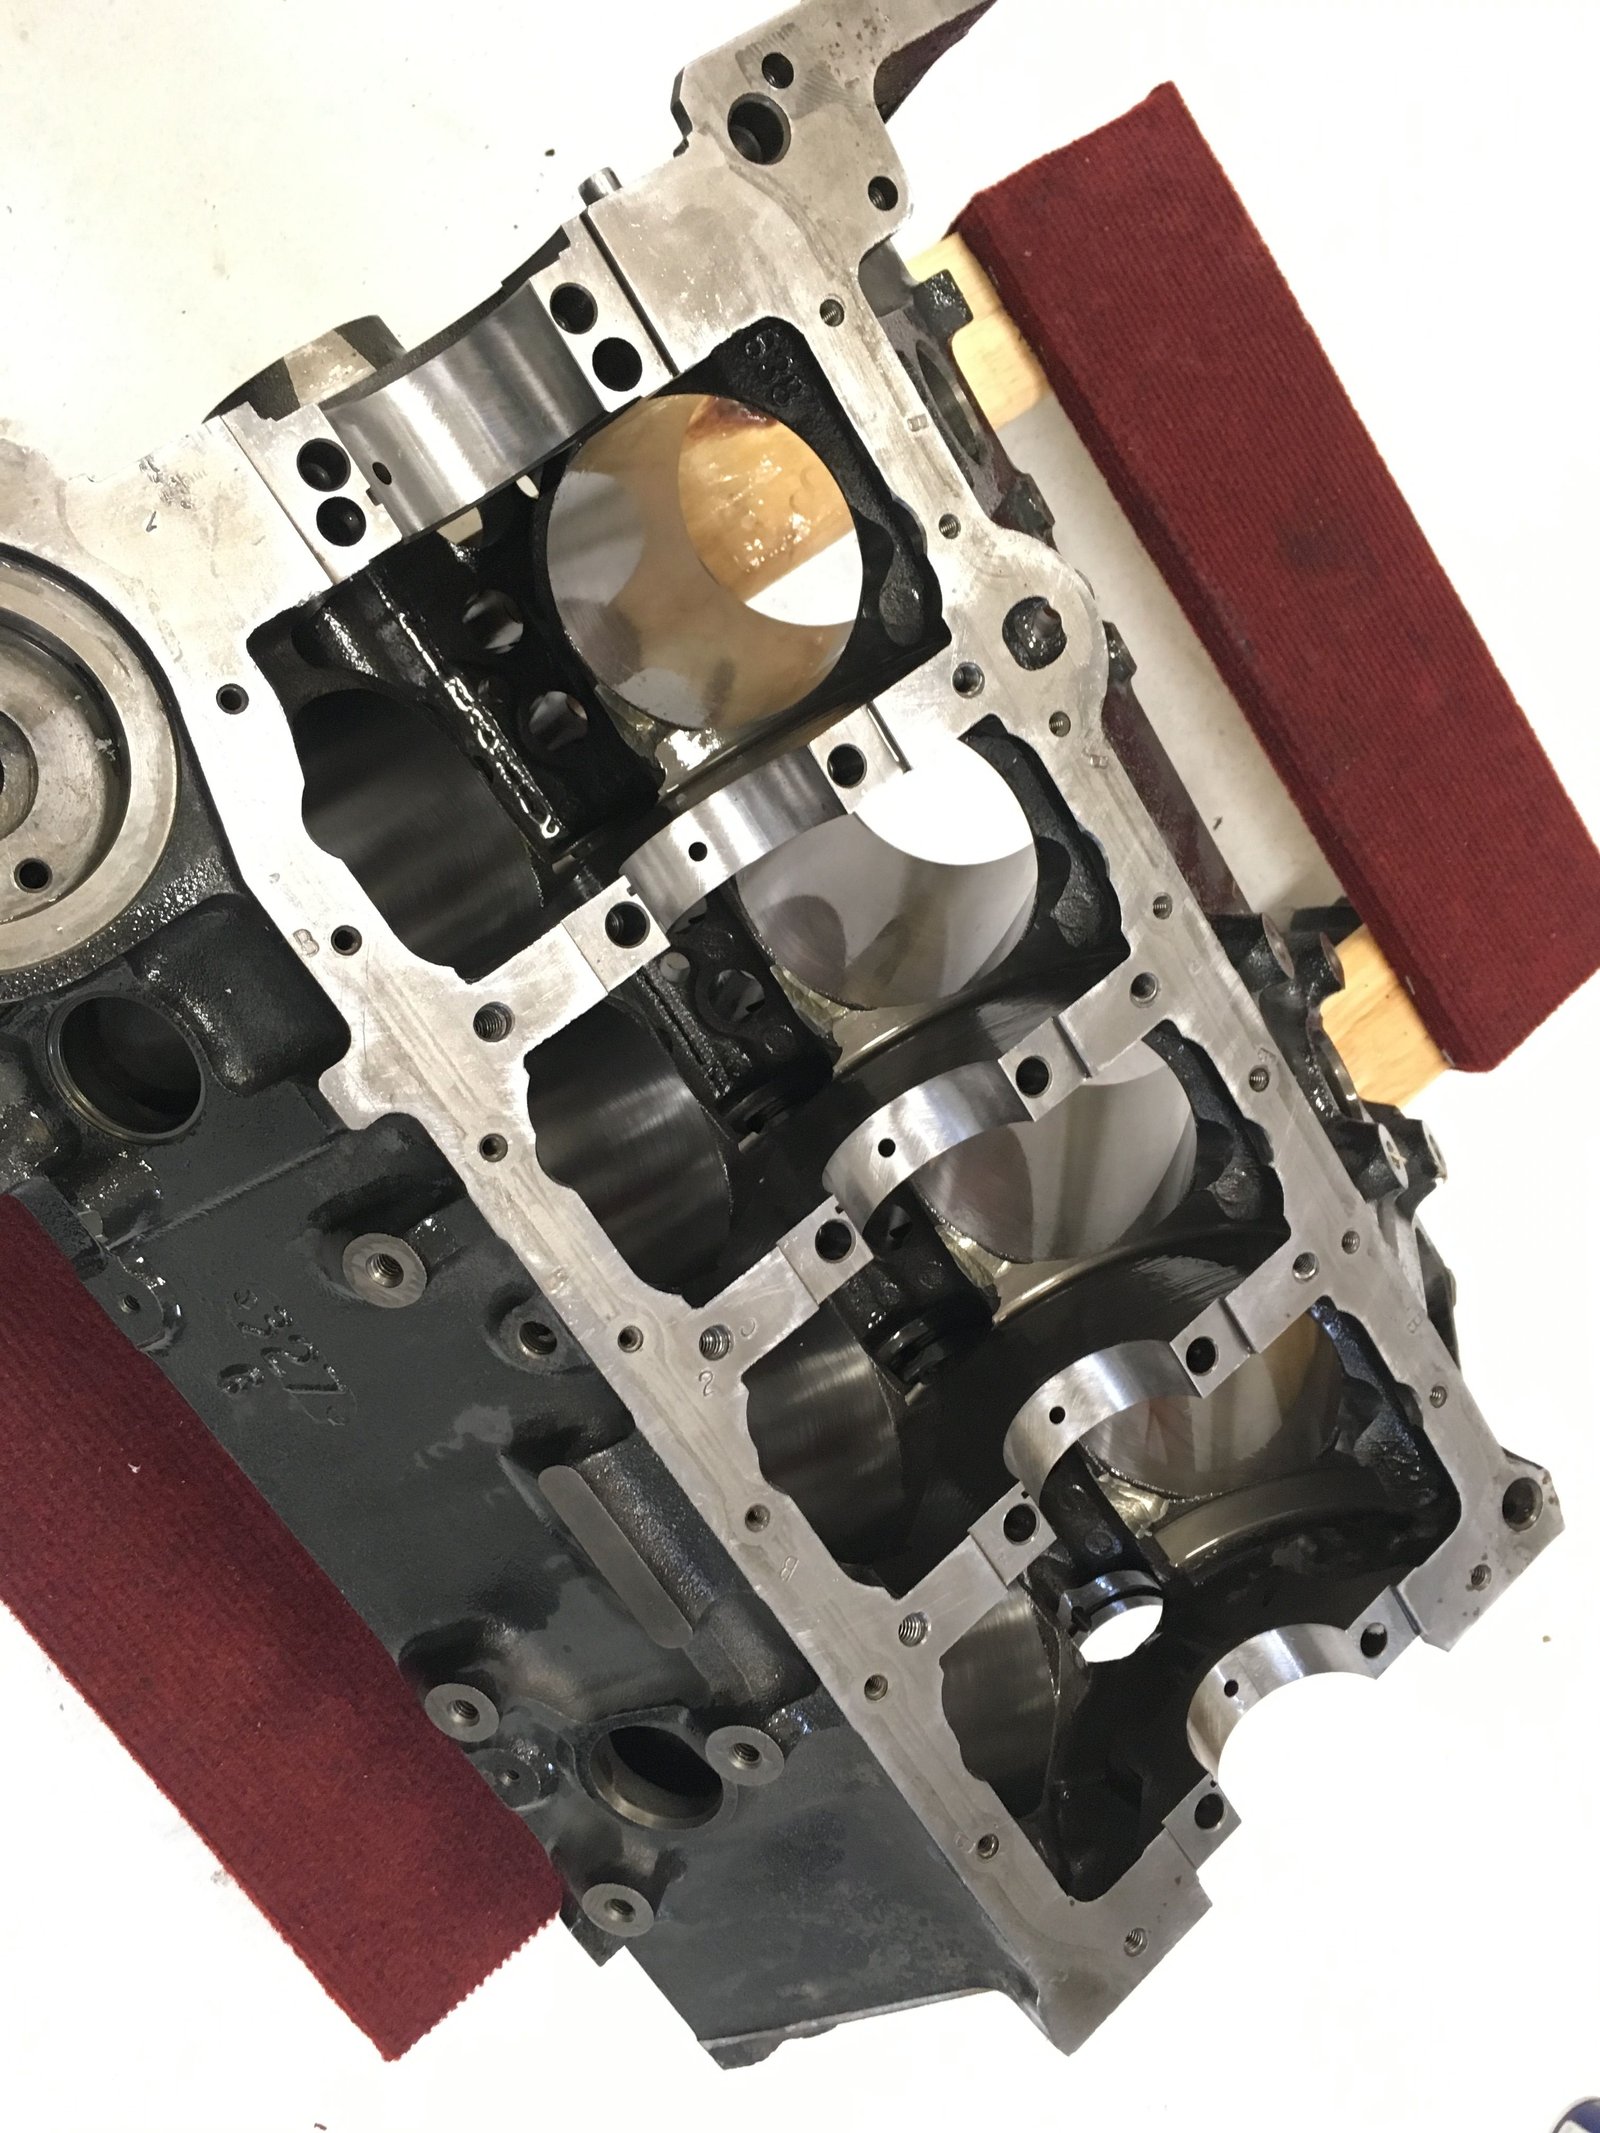
Now I mock up the rotating assembly prior to final washing.
Many times I will have to do more grinding to clearance for rods.
Crankshaft serial number for the records.
Rod bolts have good clearance.
Good piston to crank counterweight clearance.
Piston is close to zero deck height. (not measured but going
by eye). I have the block slightly decked and the crank
gives a bit more stroke and in theory, in a perfect world, the
piston will end up at zero deck height. (turns out it's not at
zero--see below actual measurments)
All rods clear the block. No need for additional
grinding. Now I'll take it all apart and clean the crank and
rods and block one more time.
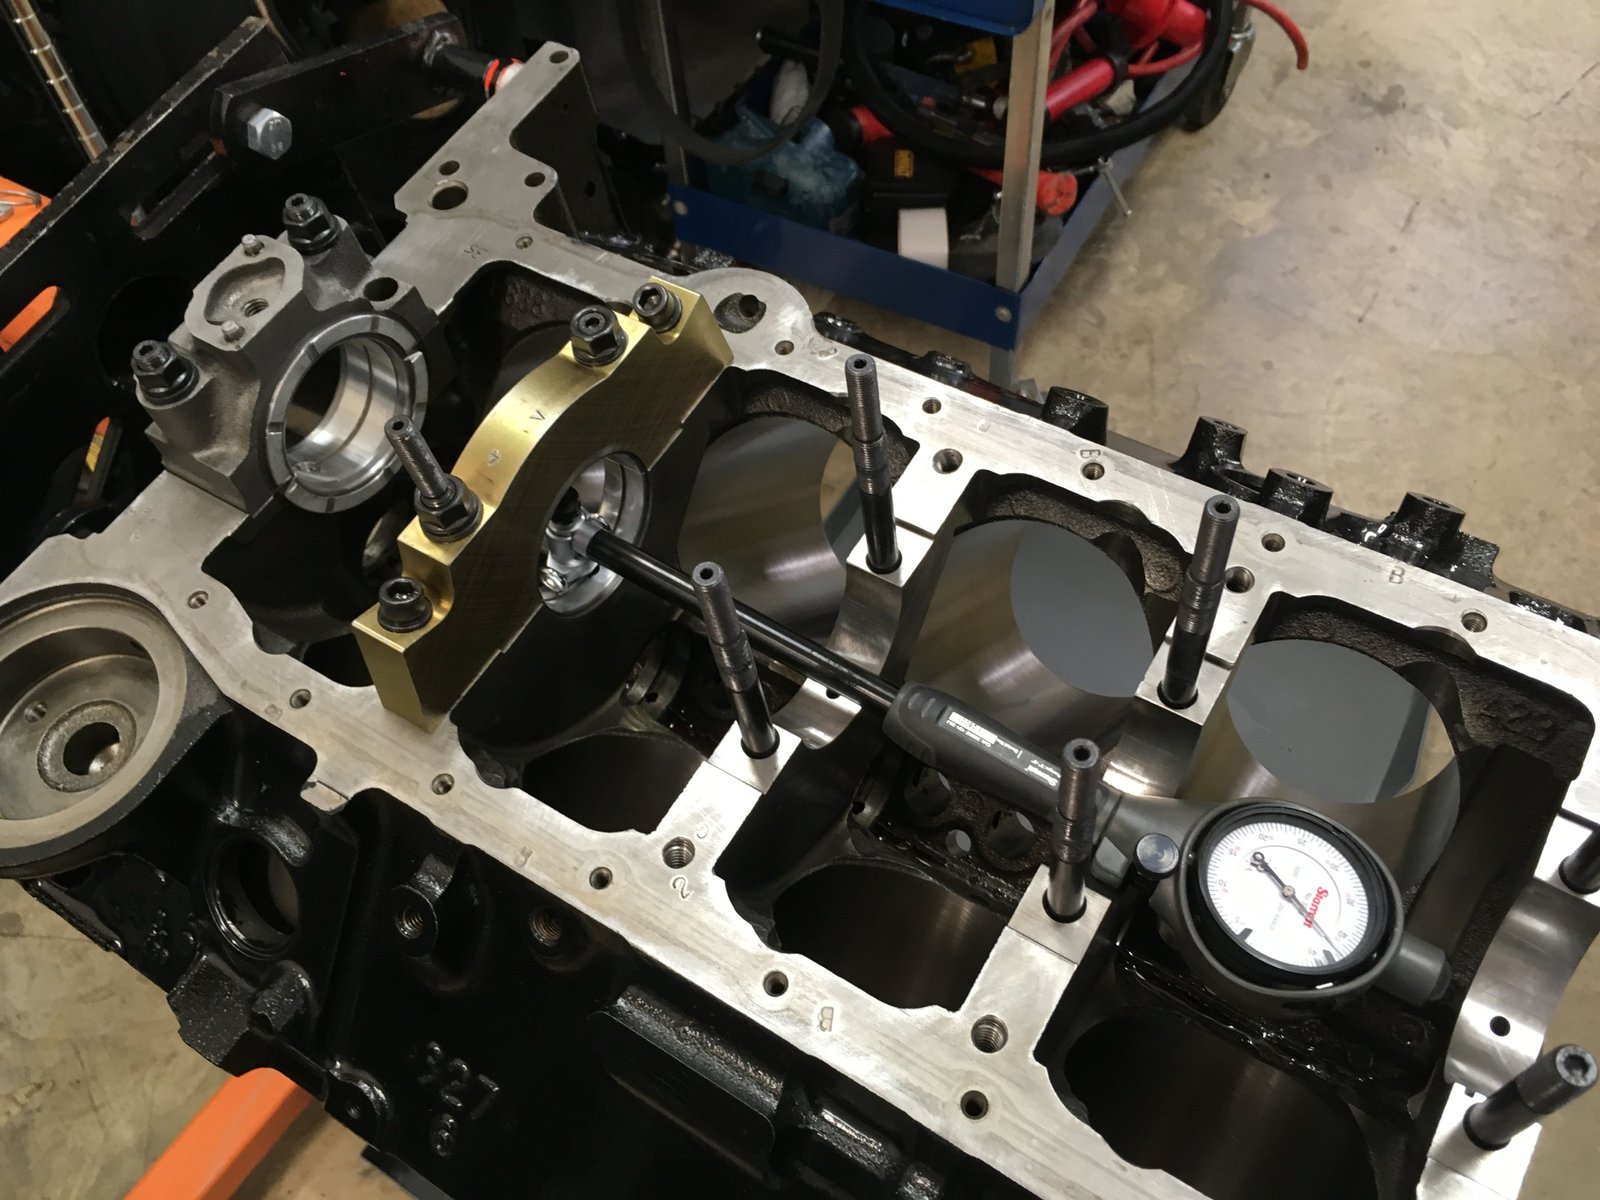
Now it is time to
check if the block is square, (relative to the rotating
assembly). I'll check each piston at the 4 corners.
Zero the mic on the deck and check #1, #7, #2, #8 at their TDC.
I check in the middle of the piston at the pin plane. Below
is what I found....
I'll take the block back to the machine shop and have the left and
right decks machined to be closer to 0.010"
Currently the block is only decked at the minimum to clean
it. It is probably at 9.015 to 9.020". I like to
do the minimum decking so that intake manifolds fit well.
Beginning the painting process.
Ok a lot has happened since last time working on this
motor. Pistons went out for Swain Tech thermal top, (Gold
coat). Spiro-locs had to be removed to get the pistons off
the rods and these cannot (should not) be re-used. See how
they have been stretched out of shape. I have a new set.
Also the heads have had the spring height set to 1.750" and
180# on the seat.
Today is a prep and measure day. The crankshaft rod
journals were checked for size and one of eight rods was checked for
bearing clearance. Here is a quickie check with digital
calipers. 1.9980"
The micrometer gives 1.9993" The mic and calipers
dont agree and that shows it's hard to be accurate to the
.001" with calipers. The dial bore zeros out to the mic
and then the rod bolts get torqued to 80 ft-lb. That gives
.0020" clearance with the Clevite CB-745HN bearing.
0.0020" clearance with Clevite CB-745HN bearing. I
just checked this one rod for now. Going to work on the main
cap clearance 1st. Notice the gray folder says Manley spring
set to 1.860" Now it's 1.750"
I set the main bearing in place and usually the stock oil hole
will not perfectly line up. Here is a minor widening of the
oil hole with a dremmel.
I do the clearancing with the bearing in place to give a smooth
transition. The block still needs a final cleaning so I'm not
concerned with grinding debris right now although I cleaned the
mains after doing this.
Now to the main cap bearing clearance fit. I already fit
the rear main #5 and it was good with the standard size King
HP. 0.0035". The Callies crank main journals are
all 2.4480" by the way.
I put the shorter ARP studs in place of the windage tray kit
studs, (all but 3). The Milodon caps are tall and give many
a fit for having barely enough thread on the main stud. I
use a thin washer to help and yes it's about 1 thread short but it
torques down with a solid 80 ft-lb.
Finished fitting the main bearings and caps. #1 @
.0025", #2 @ .0027", #3 @ .0025, #4 @ .0025, #5 @
.0035"
# 2 and #3 cap needed an "x" bearing 1/2 mixed with
a standard size bearing 1/2. The x means .001" over
size. The standard/standard pair gave .0020 to .0022" and I
prefer to be at least .0025" on the mains with a high power
forced induction motor. Notice the darker bearing 1/2 on #2
cap. This is a King XP type and that is why it is
darker. The #1 stock main cap received a Clevite MS909H
standard size at both 1/2 shells.
Ring filing: Forced induction up to 30 psi, 0.028"
for both #1 and #2 ring. Total seal rings.
Now to final assembly. Almost everything gets washed one
more time. Pistons/pins/rods/rings/block.
Rod and piston assemblies with rings installed.
Block is washed for the last time. Dried and oiled.
I use lint free micro-fiber cloths instead of paper towels. (almost
lint free).
Cam bearings being installed. I set an alen wrench in the
oil hole as a tell-tale that I have the oil hole centered over the
block oil groove. Sometimes it's hard to see.
I always take a photo of the oil galley plug that goes under the
rear main cap. This gives me confidence and evidence that I
did actually install this plug.
Making sure that everything is clean and stays clean. Here is
the crankshaft just after a final washing in the "clean"
parts washer. I have two drums of Safety-Kleen cleaning
fluid. One is grungy and one is almost new and clean.
Crank main caps torqued and all rods/pistons installed and
torqued. (80 ft-lb on the inner mains and 45 ft-lb on the
outer small alen head bolts). 80 ft-lb on the rod bolts.
Another view of the short block.
And another view.
And another view.
The camshaft is in and the front galley plugs are in. The
cam galley is fully plugged and the lifter galleys are weep hole
plugged.
Timing set has 2 parts. It's mostly the Cloyes extreme
but the crank sprocket has been machined to fit over the
1.6000" BBC crank post.
Timing set at "zero" and the cam degree check is
good. 111 deg intake centerline. The cam card calls for
that. There is really no adjustment in case if off a few
degrees. Sometimes you can bolt the cam sprocket down while
forcing clockwise or counterclockwise to get one degree change.
Notice the cam bolts are generic. I am out of ARP brand
and need to get them on order tomorrow. These will be
replaced one for one as soon as I get the ARP bolts.
Interesting that Crower uses Johnson for their link bar roller
lifters. The best of the best.
Crower instructions say do not clean the lifters. Simply
soak in engine oil.
cc volume measurement of one of the Ai TFS combustion chambers
= 60 cc
I filled my 100 ml graduated cylinder and took 60 ml
Also curious to know exact cc for the piston and deck
height. This is 35 cc and yes that bubble showed up by time I
filled it and took the photo...some leaked by the rings. So
that is 32 cc for the piston and 3 cc for the -0.010" piston in
the hole and the space up to the rings.
With this 8.4 ml gasket the compression ratio is 8.84 : 1 on
the nose...exact.
ARP head studs torqued to 80 ft-lb with ARP lube. I use
RTV for the threads to the block.
Due to the Johnson/Crower lifters the pushrods are not the
usual length. I tried 7.2 and 7.35" from my drawer
stock all too short and then 7.60" (too tall).
But it looks like I need 7.450" (on order)
Melling 10554 Shark Tooth with Stef's oil pump pickup.
Slightly dented from my press-hammer. This oil pump is quiet
and smooth. Standard volume with high pressure spring.
Received the 7.450" pushrods and they fit nicely.
Also received the ARP cam bolts although I don't think the
tall heads are going to allow for the TorqHead sensor unit to fit.
I was right about the wrong cam bolts. Going back to
temporary bolts for now.
Finding the best of my core parts to make a water pump drive
gear. Also using the Cloyes extreme water pump drive
gear. Don't use a stock drive gear. It's softer and
different gear pitch.
I have had a few EFI Connection Big Block Chevey nose 24x
reluctors and why not donate this one to act as the reluctor
space. The TPIS timing cover was designed for this exact
reluctor.
See here on the inside of the timing cover that space was
provided by TPIS for this EFI Connection reluctor. The last
time I used one of these for a customer was on ERE-399.
The crankshaft seal for future reference.
2 crank/hub keys. 1/4" and 3/16"
Adjustable guide plates set and lifter preload at 1/2 turn.
The rockers come close to the stud, (but not touching).
Rear main seal housing and seal installed. (Centered by
.004" feeler gauge between crank and housing).
Windage tray clearanced for rods. Just slighly.
<------------------------------------
Dipstick tube and stick making it past the main cap and through
the windage tray hole. Oil pan on. Right now with RTV between gasket and block
but NOT between pan and gasket. If there are leaks during
the dyno session I'll RTV it. But if no leaks it's nice to
be able to take the pan off without being stuck to the oil pan
gasket.
Cam bolts soon.
Then Dyno.
ARP cam bolts. Yes that cam pin looks funny. It is
because I tapered the nose of the pin with a grinder prior to
installation. The pins are always too long out of the box.
(for the TorqHead sensing unit). Better to grind it before you
install it.
ATI/TorqHead hub press-on. This fits over the
1.6000" OD of the BBC crank nose.
2 shims needed for proper sensor air gap.
Spun up the oil pump and cold oil pressure is 75 psig. All
lifters and pushrods and rockers have a trickle of oil.
Ready for the intake manifold.
Modified timing pointer set on my mark at 36 deg BTDC.
This is where I set the distributor for the dyno.
Autolite spark plugs installed before dyno headers. The
plugs are Autolite 3924 which are the suggested plug by Trick
Flow. Don't use these plugs if you are forced induction or
nitrous.
All ready for the dyno session.
Here is the dyno test set up. Holley 850cfm carb.
Dyno headers. My electric water pump. The dyno sessions
are performed mainly to seat the rings and the owner can then go
directly to synthetic oil.
Here I noticed the crank bolt was bolted to the crank nose and
not the damper. I added a bushing and fixed that.