|

Started the project with a
block I had "on the shelf". I found a blemish/pit
in one of the bores and had to abort and find another block.
|

Here is the Eagle forged rotating kit. Very nicely put
together. The balance bob weight is 1778g. |
 |

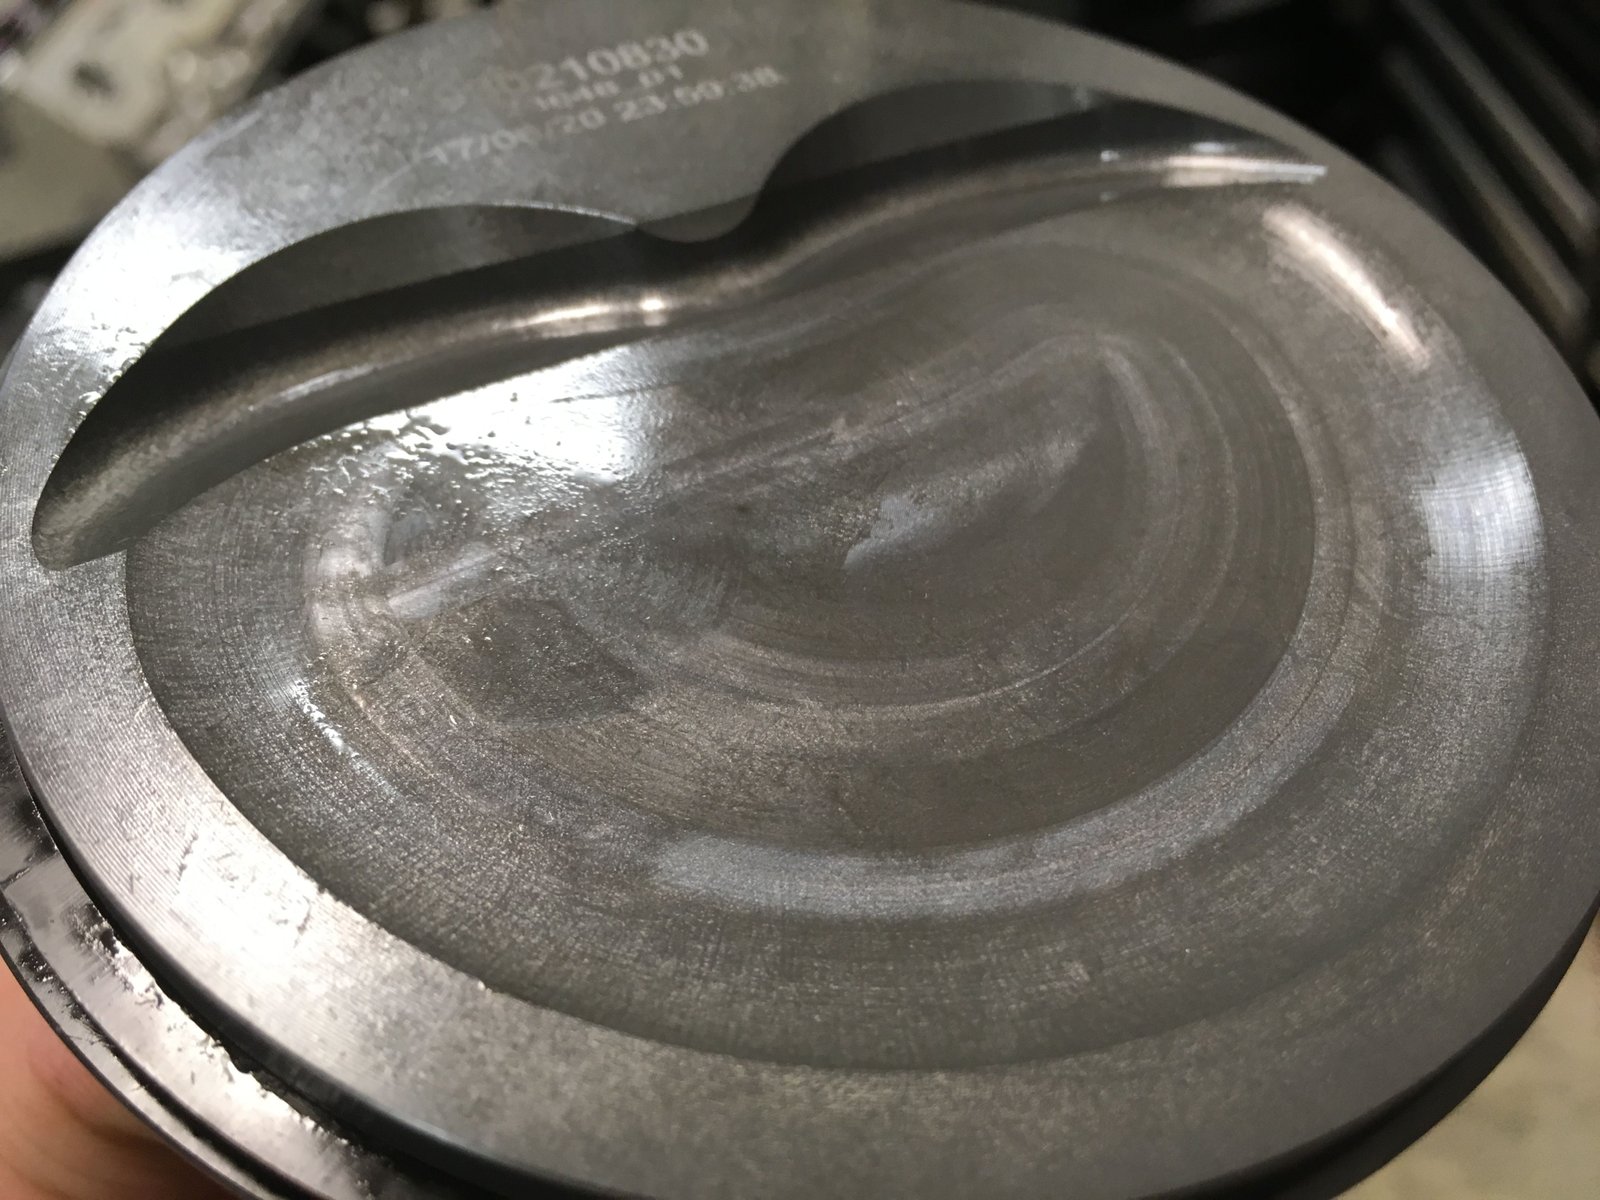
Mahle piston with 1mm ring pack. Mahle pioneered the
ultra thin piston ring pack. |

Here is the new block. The one above had a pit in
one of the cylinder bores. Here is a POR-15 Chevy Orange paint
job.
|

It took quite a few months to get the replacement block back
from the machine shop. |

1st coat on the other side. After this dries a bit then
I'll touch up the thin areas.
|
 |

Piston # 930210830 from Mahle with the 1mm ring pack.
Piston to wall clearance is .003 to .0035"
|

Gapping for hot street and occasional nitrous use, (.024"
top and .020" 2nd ring). |

This is the 2nd ring at .020"
|

Again the 2nd ring in my bore gauge. |

|

Top ring at .024". |

Top ring again show in the bore.
|

Piston and rods assembled. Rings installed. Still
need to check rod bearing clearance. |

|

The crankshaft in the build is the forged steel Eagle part
number #435337505700. It is internal (neutral) balance. |

Rod journals at 2.0995", (Mains at 2.4481 to 2.4486")
|

Ended up using a .001" oversize bearings, (X). This
is the premium King MB 557HPSTDX. |

|

All at .0020" except for #3 (and the thrust #5). |

I changed out one of the bearing shells here at #3 main
cap. This is a mix of standard size and X size and that gives
a .0020" clearance.
|

Block clearancing. I do this by hand when I use my local
machine shop. When I have blocks directly from Golen then he
does the clearancing for me. :) |

|

Motor is roughly assembled to verify block clearance and camshaft
to rod clearance. A little bit more is needed for the block
to rod bolt area. |

I peeled away the paint in this area. It was not sticking
well. Will touch up at the end of the build.
|
 |

2nd clearancing complete and block cleaned up. Camshaft
bearings and camshaft installed. Comp 503 cam.
|

Crank thrust is .008" |

Verification of oil galley plug.
|

Front oil galley plugs. |

Refurbished water pump drive with the Cloyes extreme timing set
water pump gear added.
|

Cloyes extreme timing set. |

Rod bearing clearance check.
|

From .0020" to .0024" |

Rod side clearance is .021". Rod bolts torqued to
65ft-lb.
|
 |

Pistons in hole (-) .011"
|

Camshaft degree shows 108 deg intake centerline. Cam card
also specifies 108. |

Crower hydraulic lifters and GMPP lifter spider.
|

Mr. Gasket 0.026" head gasket. |

Ai heads.
|

57cc combustion chamber as measured by Ai. |

|
 |

|
ARP head bolts will
be installed and torqued to 70ft-lb. Stay posted over the
next few days for the completion of the long block and shipping to
Florida. |

...The next day...ARP head bolts installed @70ft-lb
|

Comp roller rockers here. Also testing the Manley
7.250" pushrods. The check is to see if the rocker tip
rides the valve tip in the right spot. |

|

7.250" looks to be a good pick. You may have
noticed in the photo to the left that I'm using AFR guide
plates. That is only for today. I forgot to order the
Manley guide plates that I feel work best. They will be here
tomorrow. |

Windage tray adjustment work. I bend the tray up in the
area that these rod bolts pass. Otherwise they would hit the
tray.
|

Melling 155 oil pump installed and waiting for the oil pump
drive shaft, (ARP 134-7901). Also have the oil pump pickup
in the deep freeze. I'll press it on tomorrow. |

ARP oil pump drive shaft arrived and is now installed, as well
as the oil pump pickup. I'm a big believer in the press-in
technique due to the heat of welding causing more trouble than it's
worth.
|

I also like to use an oil pump stud to fasten the oil pump. |

Here are the proper pushrod guide plates. These are the
Manley brand and recently I found these to give the best rocker to
valve tip fit of any others.
|

All rockers installed and pre-load of the Crower lifters is
1/2 turn past zero lash. |

|

Touch up paint applied. Now waiting for the paint to
dry. |

The oil pan requires a bit of clearance, (message), for the
front 2 connecting rods.
|

This is a new GM oil pan. It will be painted orange
after it is installed. Still to do: Install front timing
cover, rear main seal, fill with oil and test oil pressure and
that oil comes up the pushrods. |

1996 reluctor wheel. This won't be used but it keeps all
future hubs lined up properly.
|

Rear main seal housing. It has to be installed with
exact centering around the crankshaft. I put 3 feeler gauges
between the housing and the crank to make sure it's even. |

|
 |

|
 |

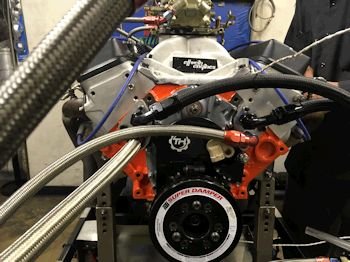
Plastic wrap for keeping dust out of the engine while I finish
up a few things. My spare damper and hub is temporarily
installed as well as my opti spark. That is to plug all the
holes in the time cover for the following oil system pressure test.
|
 |

The oil pump spins with the drill. It shows 62psig with
cold oil.
|

I ran the drill 20 minutes until oil trickled (finally) from
the pushrods to the rocker tips. |

Here is one mess-up. I never extracted this broken oil
dip-stick tube bolt.
|

I tried getting the bolt out via ez out and drilling but I
made the hole too wide for the stock bolt. Hopefully I can
talk you into using a LoKar dipstick tube? That secures to
the head and not to the block. |

|
 |

|
 |
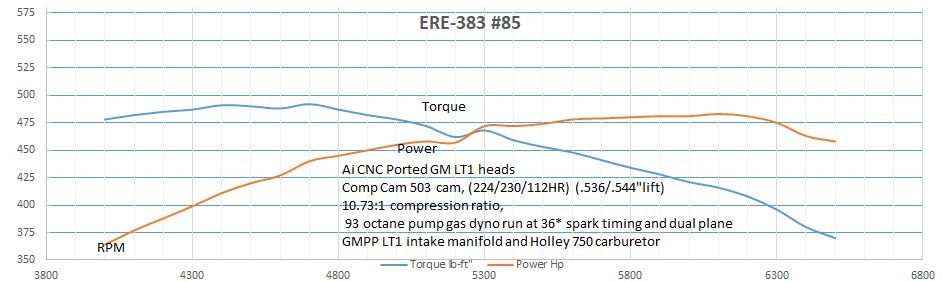
Here is what you can have for power and
torque with a good street/longevity camshaft.
(low lift and short duration)
|
|
|