|
ERE#4 is a .040" over LT1 block decked to 9.000"
LINK
back to the ERE#4 Build Web
Page.
The rotating assembly is all forged with an
"Ohio Crank" 4340 crank, H-beam rods, JE/SRP flat-top
pistons with Oliver splayed main caps at 2, 3 & 4 with ARP main
studs. Before I install the customer's LE2 Trick Flow cylinder heads
and Bauer Racing Engines hydraulic cam I'll test run the short block with my
LT4 heads and street solid roller cam. Running the short block
prior to delivery will "qualify" the motor. Below
are photos of the basic build along with the recent preparations for
running the motor in my car for short block qualifying.

This is the finished product as of 4-21-06:

Not a very glamorous photo but it shows the business end splayed
Oliver caps with 4340 forged crank and rods.
ERE #4 assembly, parts detail:
The block is from my first LT1 383 which was
purchased from Agostino Racing Engines. I have been using it
for the past 7 years off and on and have reassembled it numerous
times with a fresh hone and other parts as needed. In 2005 I
made a tuning mistake and gave the motor way too much spark advance
and thus rattled the pistons to death. The block was then
bored 0.040" over.
Parts
GM LT1 block
Ohio Crank 383 kit
Oliver splayed main caps
Cloyes timing set
Cam bearings and plug kit
ARP main stud kit
The Ohio Crank 383 Kit consist of;
Race coated bearings
Total Seal file fit rings
3.75" stroke 4340 steel crank
6.0" H-beam rods
JE/SRP forged pistons
internal balance
Machine work:
Bore & hone to .040,
R&R cam bearings and galley plugs,
Fit splayed caps and align bore/hone,
Re-balance rotating assembly: 3 slugs
of mallory added and metal removed in key locations. I
had no experience with Ohio Crank's balance work and it was a good
thing I double checked their work.
Why buy an Ellwein Engine?
For the last 7 years I have been assembling LT1 engines for my Impala
SS racing hobby. I enjoy engine building and would like to
begin building an occasional engine for public sale. Although professional
engine builders can offer the same parts and machine work quality
for close to the same cost, I can offer a great amount of attention to
detail during assembly with full testing and qualifying prior to
delivery. Most shops charge big $$$ to qualify an engine but
I'll be offering this service for free in order to get my engine
building company launched.
Past and future projects

LINK
to ERE#2 web page
LINK
to ERE#3 web page
LINK
to ESE#5 web page
LINK
to ERE#6 web page
Short Block Qualifying
Install for Road Testing

5-20-06: ERE4 overshadows ERE3.
In a few days ERE4 will be in my car and running on the street for
testing.

5-21-06: Install into my DGGM Impala SS for street
testing. Waiting for parts store to open on Sunday morning to
purchase a rear main seal. The testing/qualifying will be
performed to verify good oil pressure and piston ring seating.
If it passes the test then I'll install my customer's LE2 heads and
Bauer Racing Engines cam and deliver the finished motor. You
might wonder why I don't test with the LE2 heads/cam. That is
to reduce the risk of something going wrong and damaging those
valuable works of mechanical art.


Attempting to install with the right side G-Hann headers
installed. I've been able to do this in the past. Some
days go better than others. I learned years ago from Chris
Lang that things go smoother if you jack the tranny up high.

ERE4 with my GMLT4 heads and Crane street solid roller cam is on the
motor mounts and the tranny has 4 of 6 bolts tight. This took
1 hour from cherry pick to tranny bolts.
Went out on the road and gave the engine some load
to help seat the rings. Initial start up room temp. oil (30HD
grade) gives 40-45psi at 1000rpm. Then after the oil is good
and hot, 210F, I get 10psi at 1000rpm, 30psi at 2000rpm, 40psi at
3000rpm, 50psi at 4000rpm. I do think we want more idle oil
pressure so maybe 20W-50 oil will help but also there is #1 main
bearing clearance that needs to be tightened up. It's at
.003" right now and I plan to try to get it to .002" with
oversized bearings. All the other mains are at the proper
clearance and I don't know why I didn't get #1 correct before the
qualifying. I'm going to get some 20W-50 oil and try that next
but #1 main needs to be .0015 to .002" and not .003".
Next day, 5-22-06: Castrol GTX 20W-50 is in
and hot oil pressure at 1000rpm is 20psi. That of course might
go up to at least 25psi when I tighten #1 main bearing
clearance. Even now the oil pressure is pretty good but my
road racing customer needs it be even better.
The engine so far is running excellent. The
forged pistons are quiet and lots of my forged piston motors are a
bit "ice cube" sounding. This one is pretty
quite. No vibrations and very quick revving. Very smooth
too. Not one hint of oil seeping from the pan or front/rear
seal. Of course I have not gone WOT yet but so far so good.
5-23-06:
More street runs and a few brief wide open throttle moments. (I roll
past 1st gear, then into 2nd I roll squeeze the throttle to a
gradual WOT and then stop at 3rd gear). Good clean exhaust gas
and no oil pushing out the seals or valve covers. I'm ready to
pull the motor and check bearings and also make the main bearing
clearance at #1 tighter like it should have been to begin with. (I
still don't know how I didn't notice that initially but it's written
down in my notes).
Installing LE2
Heads and LE3.2 Cam

Comps instructs to oil the journals with motor oil.
I did not use that molly lube in the tray. It seems to be too
gritty.

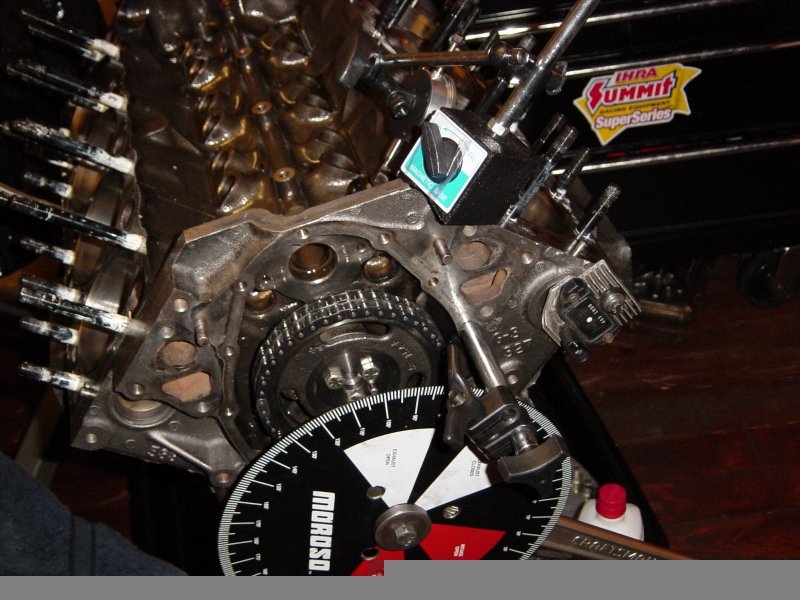
My set up for TDC. I don't use a piston stop. I just
find max lift on the piston with my dial gauge. My zero
pointer is this solid rod screwed into the front of the block.
I eyeball the degree wheel referenced to a spot on the block so my
perspective is always the same.

I use a solid roller lifter and the crank turning nut on the snout
behind the wheel. The cam was phased almost perfectly on this
first check. Whatever I had the crank sprocket installed at
was where it needed to be. Lucky me.

Here is the LE3.2 cam designed by Bret Bauer of Bauer Racing
Engines, Upstate New York. The photo has fake masking of the
specs. I'm a big believer of honoring peoples intellectual
property.
LE2 Trick Flow 195
Heads fully ported by Lloyd Elliott

Trick Flow LT1-195cc

Combustion chamber volume = 62cc, (this photo shows 60cc and 2
more ml get's it full to the brim).

You can almost see the gasketed spark plug that is needed for
the TFS heads. I set it up here to pose for the camera just
prior to doing the combustion chamber cc. This plug is a NGK
FR5. The valves are 2.080" intake and 1.635" exhaust
and these things make huge power.

7/16" rocker studs arrive and now is the time to find out what
length pushrod is needed. This witness mark works out to
7.100" on the adjustable pushrod. According to Comp I
could not just measure the adj. pushrod and call them up. I
had to measure the adj. pushrod, then measure an actual manufactured
pushrod to use as a standard. Then find the difference between
the standard and my adjustable pushrod. Then subtract that
difference from the standard, (which was longer), to get the value
for the length I had to order. After an hour of advance math
study I cam up with 7.100 and order them from Summit Racing.
|
Short Block Qualifying
Adding my heads/cam to allow
for road testing.

Trying to find a good oil pump that fits either my Stef's oil pan or
a stock oil pan. Here is the Melling Select 10552 oil
pump. Supposed to provide 70psi at equilibrium. Steel
hardened gears and bolt on pickup

This is the pickup that ended up fitting best.

Measured out to 3/8" from bottom of Stef's oil pan.

Getting ready to put my LT4 heads on the road racing customer's motor. New ARP
head studs and lots of ARP thread goop.

Left side head on and torqued.

Now both heads are on. Time to put the shaft rockers on and
check pushrod length.

After putting on the T&D shaft rockers I measured for pushrod
length. It's pretty dang easy with shaft rockers because the
proper rocker height is determined by the rocker stand and not
pushrod length. Pushrod length is determined so that there is
enough adjustment for setting lash. (Using 7.60" on left head
and 7.70" on the right head which are the same pushrods from
ERE#3)

On hold for now. Turns out that the trap door hits the oil
pump pickup. Gotta find a different pump and pickup combo.

A couple days later it dawned on me that I had a few Moroso oil
pumps on the shelf. I tried this Moroso oil pump for fit with
the Stef's pan.

Nice pump. It's a blueprinted Melling M55HV normal
pressure with welded pickup. This one is for a 8.25" deep
sump though. The Stef's is 8.0" and a no-go.

How about just using a stock pan and go back to the Melling
Select oil pump with stock style pickup. I think the 7.5"
pickup worked but I'm not sure which one I used. It measured
about 3/8" off the bottom though.

Testing now for oil pressure and this is at low rpm.

Testing now at mid rpm.

And this is my simple oil pump test. Oil cooler hooked up
and drill with pump turning tool. I spin the drill at what
might be about 1000rpm, (maybe a bit higher). The oil is 5W30
GTX because that's the cheap stuff I use for testing. For
engine break-in I'll probably use a much thicker conventional
oil. This test really just checks the pump and it's relief
spring setting as well as helps to uncover major problems prior to
engine install.
5-24-06 Teardown
Inspection

After 4 days on the road, (only about 75 miles), and 3 oil changes
the short block passed most of it's testing accept for oil
pressure. Oil pressure is OK but we want it to be better than
OK. I looked in the bearing clearance records and yes I had #1
main at .003" and maybe I thought then that I will adjust it
but that never happened.

Photo taken immediately after removing oil pan.

All main bottom bearings in view. Not perfect but all the wear
is even and no oil starvation.

Here is #1 main top shell which I will replace with a 1 under or 2
under. A note on the main bearings. I noticed that I had
a 1 under for the thrust and I guess that was on purpose because
that clearance is still .003" I just never noted
that it was a 1 under. #1,2,3,4 are all
"standard". I want to make the thrust .0025 if
possible. On 5-29-06 using .001 and .002 bearing 1/2 shells I
was able to get #1 between .0015 and .002". Final main
bearing clearance was .0018, .002, .0018, .002, .002 (1-2-3-4-5).

Here are rod caps 1,2,3,4

Here are 5,6,7,8
Perfectly even wear.

Man it's hard to show even in this macro photo. The Thrust top
bearing shell was modified by me prior to initial install because
that hole did not line up with the oil hole in the block. Now
maybe because of a loose piece that came from my filing, something
made a bit of a gouge or sharp spot right in the center of the
bearing at the center slot. I deburred that today and will
re-use this bearing 1/2. The crank is fine.


Each piston and cylinder wall is in great shape.
The rings are AWESOME.
|