The block arrived from Golen today.
|

Close inspection shows no damage from shipping.
|

Now we work on purchase of the forged
rotating assembly.
|

|

All ERE long blocks now come with the EFI connection billet timing
cover and 24x reluctor as a free upgrade.
|

TPIS makes this cover for EFI Connection.
|

EFI Connection machines the reluctor in house.
|

Now waiting on heads, lets get the weights added up for the
crankshaft balance.
|

This new line of SRP piston copies the Mahle
|

They have thin and high quality rings and light weight pins
|
|

The piston is almost a direct rip off of the Mahle.
|

Here is my computer printed bob weight card, (from Eagle)
Edit: Now the bobweight is 1628 due to upgrade to a Callies Magnum
crank and Callies rods with 2.000" rod journal and the -16cc
SRP Pro piston is also lighter.
|

This is the 1st set of Ai heads on an ERE which incorporates their
new Manley "superfinished" NexTek valve spring. More
stress relief and heat treat to minimize the chance of spring
breakage. These things cost $350 a set at Summit.
|

Advanced Induction TFS heads, CNC ported. They keep getting
better and better.
|

|

Photos of the new and proper pistons. I should have got
this SRP Pro -16cc D-dish in the 1st place. These are works of
art. As good as or better than the Mahle
|

Of course SRP copied every detail from Mahle but that is a Win-Win
situation. A good piston for a good price.
|

1.2mm top ring. LOVE IT!
|

Custom magnum crankshaft arrived.
This has gun-drilled mains and 2.000" rod journals.
Callies also balanced it to my spec
|

You might have a keen eye and notice
that the rod big end looks to be a tiny bit smaller. It is
2.000" instead of 2.100" All the better for stroke
clearance and also a bit less rotating weight.
|

POR15 engine black.
|

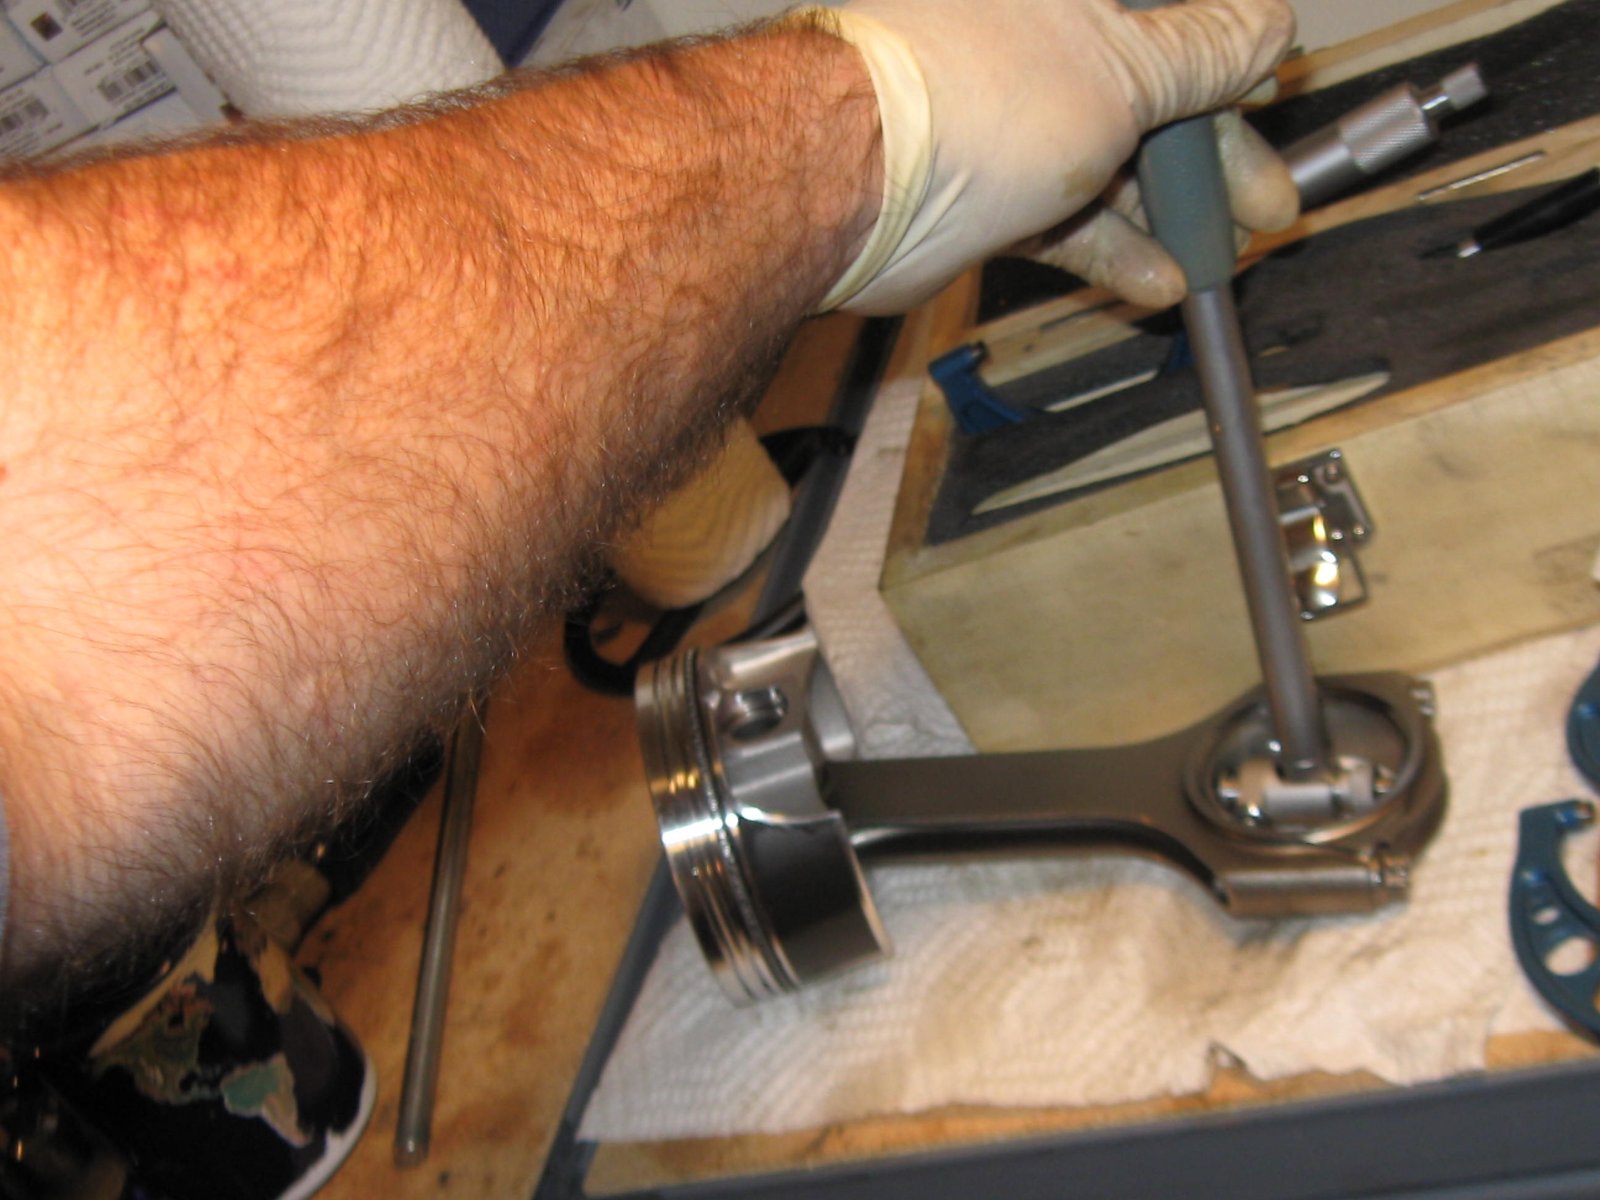
Assembly of pistons on to rods.
|

JE has copied the best practices of Mahle and now they make their
Pro series piston with a short pin and wire locks.
|

The rods are Callies/Compstar
6.000" with 2.000" journal.
|

|

you may be able to see the wire holding the pin.
|

|

Here you can see the wire ring prior to install.
|

JE also copied Mahle by using thinner rings.
|

3mm oil control ring set with support rail.
|

Piston/rods stored safely.
|

The block after a final cleaning.
|

|

Bearing oil hole needs to be wider to align with the block oil
hole. I carefully drill it wider and buff it to remove sharp
edges.
|

Main bearing clearance here is .025"
|

Then #4=.017, #3=.015, #2=.015, #1=.015
|

Before installing the main caps I check main thrust bearing with a
feeler. (=.007")
|

Then after the main caps are torqued the thrust is .008"
|

Rings filed. This is my tool that puts the ring squarely in
the hole.
|

Top ring gap is .024" (2nd ring gap=.026")
|

This is the top ring again. I guess I didn't get a photo of
the 2nd ring.
|

2.000" rod journal bearings.
|

Clearance is .0020"
|

|

And now #1 piston is in and it is
.004" out of the hole.
|

The best quality timing set.
|

This timing set even has a torrington thrust bearing
|

I like to degree check the cam as soon as #1 piston is
installed. The cam came in right at 113.5 deg intake
centerline, (exactly as the cam card). This was with the
timing set crank sprocket at zero.
|

The short block is assembled.
|

|

MLS head gasket, (big $$$). (0.100" thick)
|

This will give us a 9.0 to one static compression ratio.
|

drivers side head on.
|

Stock head bolts are temporary until the ARP set arrives in the
mail.
|

GMPP hydraulic lifter kit installed.
|

Waiting for the 2nd head gasket to arrive from Cometic
|

A couple weeks later...Cometic MLS head gasket arrives (.098")
and it looks way different than the head gasket I had on the shelf
that was listed as a 0.100" thick. I would have really
messed up if I put this thinner head gasket on one head. The
compression ratio would have been in the 10's on one side and 9.0 on
the other side..
|

So the bottom line, the one I had on the shelf was not .100"
thick like the label said.
|

This photo shows the dramatic visual difference.
|

This is the one I just ordered from Cometic, (I asked for .100"
thick and they could only do a .098" which was fine with
me). Here the uncompressed thickness is .105"
|

I'll button things up while waiting for the head gasket. Here
the bottom end is double checked. The rod bolts are at 75ft-lb
and .0055" stretch. Also the rod side clearance is
.018"
|

This is a "new-from-GM" rear main seal and housing.
A motor that cost more than $10K should have new parts....not
reconditioned.
|

I'm looking at the cam pin here. This motor will at some point
in the future have the cam sensor for the EFI connection 24x
system. The cam pin cannot be too long or it will not allow
the 1x cam sensor to be installed.
|

Here is the 24x crank reluctor from EFI connection.
|

EFI Connection billet timing cover installed and the cam sensor is
on and it seats well. The cam pin is not too long.
|

I'm sorry to say that the Titan gerotor oil pump I had set aside for
this motor is actually for a 7.0" oil pan. This is not a
big problem because I can have them send me the proper 8.0"
deep pump.
|

This is one of the 1st STEF's oil pans that has the billet front
rail. The flash messed up being able to see the serial
number....W92501110
|

Here is what they look like inside.
|

These are built especially for Ellwein Engines by Stef's. They give
me more room in the rear for a Titan oil pump and they notch the
front to allow room for an Impala SS steering center-link....and
they have my oil level switch bung installed.
|

This pan with the billet front is much better than the previous
design. They require 3.5" long front bolts which were
supplied by Stef's.
|

I test fit the pan and tightened it down to make sure the crank or
any other parts would not hit the pan.
|

Here is a photo of the 24x reluctor.
|

The rear of the crank hit the pan in that spot that I'm pointing to.
|

This is where it hits the oil pan. No biggie. I only
need to grind down on the oil pan rail where it made the mark.
|

In the mean time...the new Titan oil pump arrived. I needed to
replace the main cap nut with the 12pt in order to clear the
pump. Also, Titan provides a very nice stud for mounting the
oil pump.
|

Pump installed and stud nut torqued to 75ft-lb. Verified oil
pan clearance to be 5/16"
|

Back to the oil pan. I clearanced it at the spot where the
crank hit.
|

The pan was disassembled and washed.
|

Head mocked up, (not torqued). Checking for pushrod length.
|

I put a 7.000" pushrod in...too short.
|

Thankfully I have a bunch to choose from.
|

7.150" is perfect.
|

Photo of the Cometic gasket part number CAGC5646-098 (.098"
thick)
|

|

|

Notice the head gasket and how thick it is. This is to lower
static compression ratio for a turbo application.
|

Another view of the head gasket and also a nice view of the intake
runners.
|


This is driver's side Crower shaft rocker at #1 exhaust. It's
a bit off-center of the valve tip. There is some room in the
shaft stand to move it forward and so I leveraged it forward while
tightening the shaft stand bolts to 65ft-lb. It's still not
centered but that is not due to the shaft rockers but the location
of the valves in the heads. There is always variance
here. The rest are pretty much centered
|

|

The reason I took so long to button up the motor...I was waiting for
the windage tray from my GM dealer. I didn't want to use an
old core so I re-stocked and ordered 5 of them. One here and 4
on the shelf. Also here is the RTV bead for the oil pan
gasket.
|

I trim the tray with tin snips to clear the Titan pump and buff the
sharp edges with a grinder and then message it to clear the
rods. Here is the RTV bead on the top of the oil pan gasket.
|

The Stef's pan is made much better these days. It still needs
RTV on the gasket though.
|

Powermaster crank hub
|

Forgot to take a photo of the cam reluctor...but here is the cam
sensor.
|
|
While turning the oil pump with my drill
parts of a latex glove fell into the motor and at that point I
stopped and re-grouped. Took the oil pan off to look for
clumps of latex and didn't find any of that but I did find some
dried up clumps of loctite that I use on the cam bolts. (I've
been removing and reinstalling the cam bolts numerous times).
So I decided to remove the cam gear and clean that all up and blow
out the motor. Latex clumps were basically just in the
cylinder head intake runners and in the lifter valley. This
set me back the cost of an oil pan gasket and I had to reschedule
the motor shipping for another day.
|

So after cleaning and blowing with air all the loctite debris I have
reassembled the cam gear and here I have a photo of the cam
reluctor.
|

These button-head bolts use a T-40 Plus. (not T-40)
|

Crank 24x reluctor and cam 1x reluctor
|

|

|

All Callies Magnum crankshafts have been delivered to me with
7/16-20 threads that start deep down in the nose. There is no
thread at the beginning of the nose. Here I'm showing my home
made hub install tool made out of 3' of threaded rod.
|

Now doing RTV for a 2nd time for a new oil pan gasket.
|

Temporary oil dip stick tube installed as a test to make sure it
does in fact install after all is said and done.
|

A good pose with good light.
|

I'm letting the RTV set for a few hours...then I'll do the final oil
pressure test.
|

Final pressure test with good clean drill and FME shields in oil
drain holes and intake runners just in case.
|

Every lifter proven to provide oil to the rockers.
|
|