|

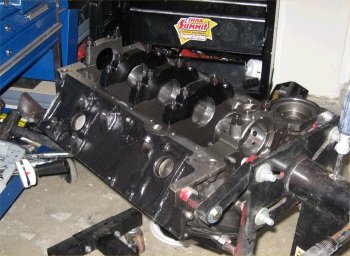
Here is a nice fresh shipment from Chad Golen at Golen Engine
Services. He machines most of my LT1 blocks for me. This
shipped on Friday and arrived on Monday. That's quicker than
USPS Priority.
|

For now I only have photos of the block. I sent the Howard's
crank and rods to the balance shop, (along with the Mahle pistons).
|
|

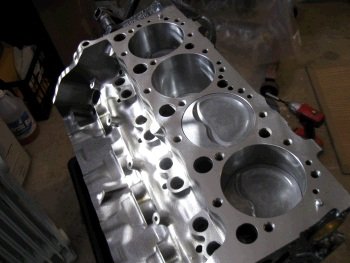
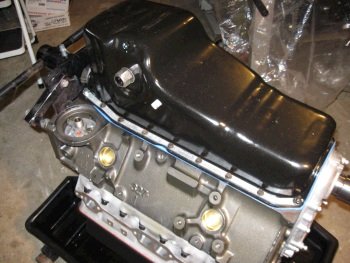
The block looks great. I gave it another spray with oil.
|

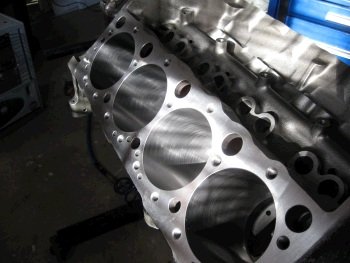
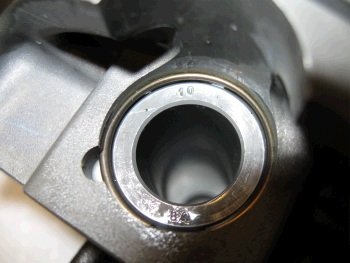
Golen has a program for clearancing my block for stroke.
|
|

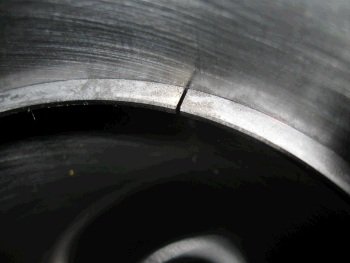
Here is a closer look at the clearance machining at the oil pan rail
and bottom of the bore.
|

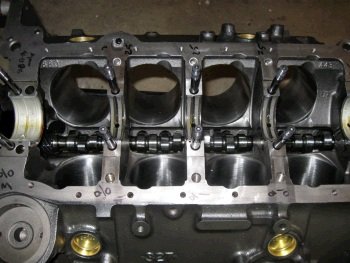
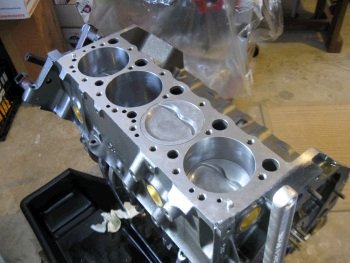
All ERE383 motors come with ProGram billet splayed main caps at #2,
3 and 4 positions.
|
|

Cleaned the block and made it ready for POR15 black engine paint.
|
I put this layer of POR15 on pretty thin because I'm putting on a
layer of Dupi-Color engine paint, "cast iron".
|
|

Now with the cast iron color applied it looks dang near exactly like
a bare block.....
|

......a bare block but with paint on it.
|
Assembly day 2: Cleaned the block.
|

Installed freeze plugs and cam bearings.
|

Ready for camshaft.
|

Ai cam. Everwear gear. Super quality.
|

Cam retainer plate new from GM with GM bolts, (blue locktite).
|

Cam installed.
|

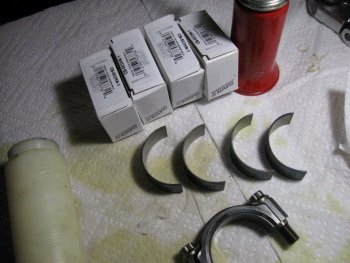
Assorted bearings. Clevite H standard and .001", P-series
also for the softer #1 and #5 stock main caps.
|

Very nice Howard's Cams Tracksmart crankshaft. 100% USA.
|

A bummer for me...the garage is cold and the crankshaft and
measuring tools all need to be room temperature and acclimated.
I use the propane blower to warm things up.
|

Plug in the oil gallery under the rear main cap.
|

Golen does an excellent job machining blocks for me.
|

Now the time consuming main bearing fitment.
|
Some standard and some .001" under bearings are used.
|

Clearance is at .025" for 1,2,3,4 and .003" for #5
|
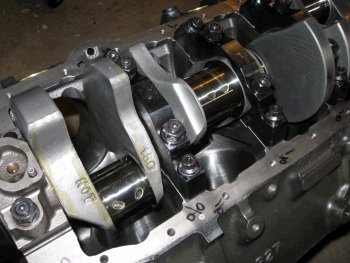
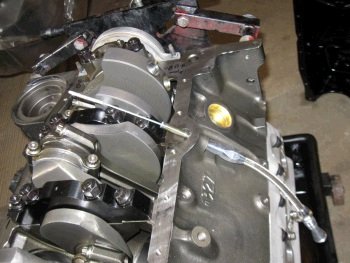
Photo of the crankshaft. It spins very nicely with the mains
torqued.
|

Howard's Cams forged I-beam 6" rod with ARP2000 rod bolt.
Mahle piston with 1.5/1.5/3.0mm piston rings.
|

Assembly of rod and piston.
|

Mahle uses a 1 gram F-1 style wire lock for the pin.
|

Tool for installing wire.
|

Rod/piston combos, (2 of them are backwards I'll discover later).
|

Pistons and rods are washed and assembled and oiled.
|

Now the even side of the motor.
|
Here is a good close up of the Mahle wire pin retainer.
|

Another photo
|

Now onward to the motor and ring filing.
|

.020" top ring and .024" 2nd ring gap.
|
Ring filing/fitting is a time that needs continuous cleaning and
wiping due to grinding dust.
|

1st ring fitted.
|

Close up of the square and clean and de-burred ring file technique.
|

2nd ring gapped at 0.024"
|

|

Rod bearing clearance. Insert standard size Clevite H-series,
zero out rod-bolt stretch gauge.
|

Torque to 0.058" stretch, (75ft-lb).
|

Measure clearance. With standard bearings we have 0.025"
which is a tad too much. I have .001" under bearings on
order.
|

Piston/rod installation.
|

1, 3, 5, 7 installed.
|
|
|

The bottom-end
|

Torque rod bolts to .058" stretch which is 75ft-lb.
|

The bottom end.
|
Here I have the .001" under rod bearing set and so the top
bearing will be standard and the bottom will be .001"
That gives me .002" to .0022" clearance.
|

I took all the piston/rods out one at a time and remeasured.
|

Crank rod journals are all 2.0990".
|

#3 rod journal
|

#7
|

Torqued all rod bolts again.
|

Crank thrust is .007"
|

Pressing on the stock GM crank sprocket.
|

Stock timing chain is very loose...(but I think we can live with
it).
|

Cam degree found to be 106 deg intake centerline. Cam card
says 107 ICL. 1 deg off is pretty good, (for a stock timing
set).
|

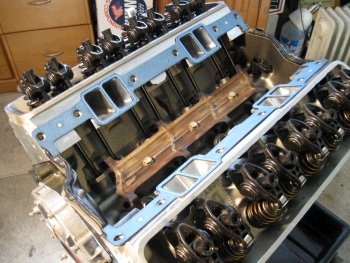
Heads on temporary. I forgot to show the piston deck measuring
but they are all .003 to .004" in the hole. I put
shop-test-only FelPro head gaskets on and the Ai CNC ported heads so
that I can measure for pushrod length.
|

Nice heads.
|

Installed customer supplied (via Ai) rocker studs and pushrod
guides.
|

Customer supplied lifters and Comp rockers.
|

Nice clear photo. The pushrod measured to be 7.050"
|

Another photo
|

Customer supplied, (via Advanced Induction), ARP head bolts...All
cleaned and with thread sealant applied.
|

And oh by the way I swapped out the generic cam bolts with ARP cam
bolts, (Customer supplied part and this is a good idea).
|

The CNC ported Ai GM LT1 heads.
|

Deck cleaned again.
|

Customer supplied FelPro 1074 head gaskets, (.039" thick).
|

At first I had this head on the drivers side but decided to swap the
heads in order to have this temp sender hole open on the passenger
side head and on the drivers side head it's plugged with a factory
plug. (those plugs are very difficult to remove). But
these heads must have came from an Fbody because the front of the
heads have plugs in them, (now at the read), and those are also hard
to remove. I am going to get a 1/4" square tool to help
with that.
|

Head bolt torque instructions, (70ft-lb).
|

Customer supplied, (via Advanced Induction), LS7? lifters. I
put them in that blue bin and soaked them in kerosine to get the
packing grease loosened up.
|

Customer supplied Locar dipstick.
|

Tube hits the main cap so it's cut short.
|

I am using an ARP head bolt that is a bit shorter so I can delete
the washer to get the bolt lower and out of the way. The stick
still slides past the bolt head and will scrape off oil when pulling
the stick...but with a careful technique the stick should still be
able to indicate the oil level.
|
Oh, and I'm expecting my Melling long main cap bolts for the windage
tray tomorrow and then I can install the stock windage tray.
|
I want to do as much as possible while waiting for the timing set
and a few other parts to arrive. Here I'm checking oil pump
pickup height and this is perfect.
|

And the oil pan is temporarily torqued down so that I can see where
the rods bump...and it turns out that no rods are hitting the pan.
|

We are upgrading to a double roller timing set, (wait until you see
it in a few days it's a beautiful piece). After that new
timing set is installed then I'll button up the bottom end.
|

3 longer Milodon main studs. They allow me to install the
stock windage tray.
|

Close up of the Milodon studs.
|

Windage tray bolted down. Rods don't touch but they are still
too close.
|

I bend up the windage tray and even though the photo does not show
it, there is more room now.
|

Stock windage tray.
|

New from GM rear main seal housing. This one came with a seal
already installed.
|

New timing cover and new oil pan too.
|

LS7 hydraulic lifters with new lifter guides, (retainers).
|

Pushrods via Ai, (7.050"
long). Rockers given 1/2-turn preload.
|

The timing set arrived from Scoggin
Dickey Performance Center. This has a torrington bearing to
ride against the cam retainer plate. It is all billet.
|

I've been waiting for this timing set to arrive and have high hopes
for it. Ed Wright turned me on to this timing set and I'm sure
the whole world has been using it...but I just learned about it.
|

Removed the stock crank gear and pressed on the new gear.
|
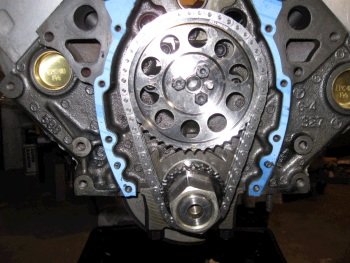
Installed at the "0" mark. The chain has a bit of
slack but no where near as much as the stock chain.
|

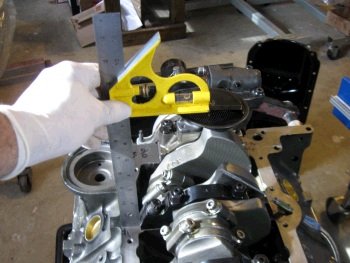
Have to degree the cam again and verify. I get 109 deg with the
"0" setting and so I put the crank sprocket on +2 and get
right on 107 deg intake centerline. (cam card says 106.9).
|

A view of my rig. Solid roller lifters are used for this.
|

Then I greased up the timing set and installed the timing cover to
see where it may interfere. Just a little bit of clearancing
is needed there.
|

Clearance complete. Timing cover washed with soap and water.
|

SFI rated flexplate.
|

Powerbond crank flange
|
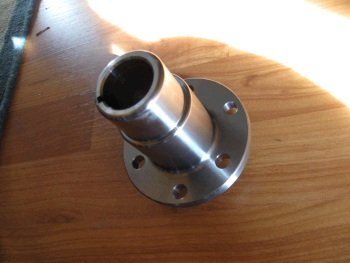
From Australia.
|

Timing cover on. Crank flange on.
|

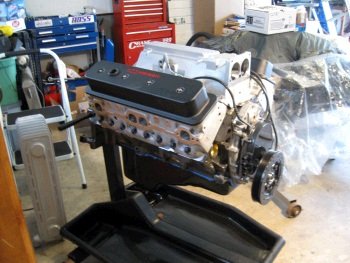
Valve covers test fit. Intake manifold test fit.
|
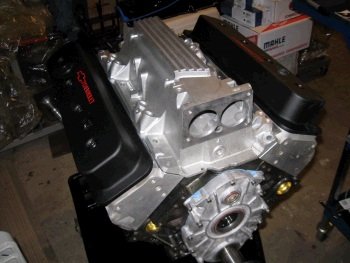
Nice looking motor.
|
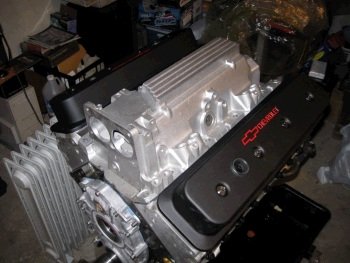
I love those valve covers. ProForm
|

Now I'm going to install the intake manifold. The lifter
spider is taken from an old junkyard motor. It's cleaned up of
all loose dirt.
|

A sneak peek at the Ai CNC porting
|

The lifter valley PCV tray is also from a junkyard core.
|
RTV
|

ready for manifold
|

Very nice stainless steel bolts and studs for the intake manifold.
|

nice.
|

Now to the oil dip stick. I took the main cap off and ground
down on it and also the bolt. This will minimize scraping of
the dipstick.
|
Oil pan on. Shop oil level sensor installed.
|

Dynaspark. Great quality.
|

|

Damper installed.
|

Posing at different camera angles.
|

|
|

|

|

Realized that I did not pre-lube the engine. I took off the
intake manifold and poored 5.5 quarts of oil in and I get 60psig at
2500 drill rpm.
|

The old greasy intake manifold scavenge core.
|
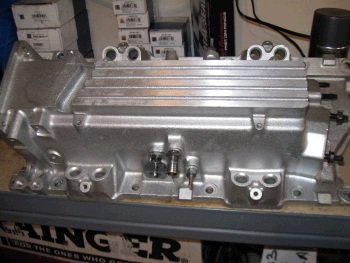
The nice new Ai ported intake manifold.
|

After pre-lube/flushing with oil and also tranny fluid, I drained it
and took the pan off for one last look.
|

|

|

|

|

One tiny piece of something in the oil pump screen. It is a
piece of paper towel.
|

Motor on shipping stand. Flexplate on with bolts torqued.
|

Ready for shipping. The motor will go on a pallet.
|

|

Bolted to a sturdy pallet. Wrapped
and wreddy to wroll.
|


